1/05
8d-123
DocuColor 12/DCCS50
REP 15.3.19, REP 15.3.20
Finisher/Sorter
Reissue
REP 15.3.19 Stapler Position Motor
Parts List on PL 18.17
Removal
WARNING
To avoid personal injury or shock, disconnect the Finisher cable connector. Switch off
the machine power and disconnect the machine Power Cord.
1. Switch off the printer power and disconnect the AC Power Cord.
2. Remove the Rear Upper Cover (REP 15.3.
7).
3. Remove the Rear Lower Cover (REP 15.3.
15).
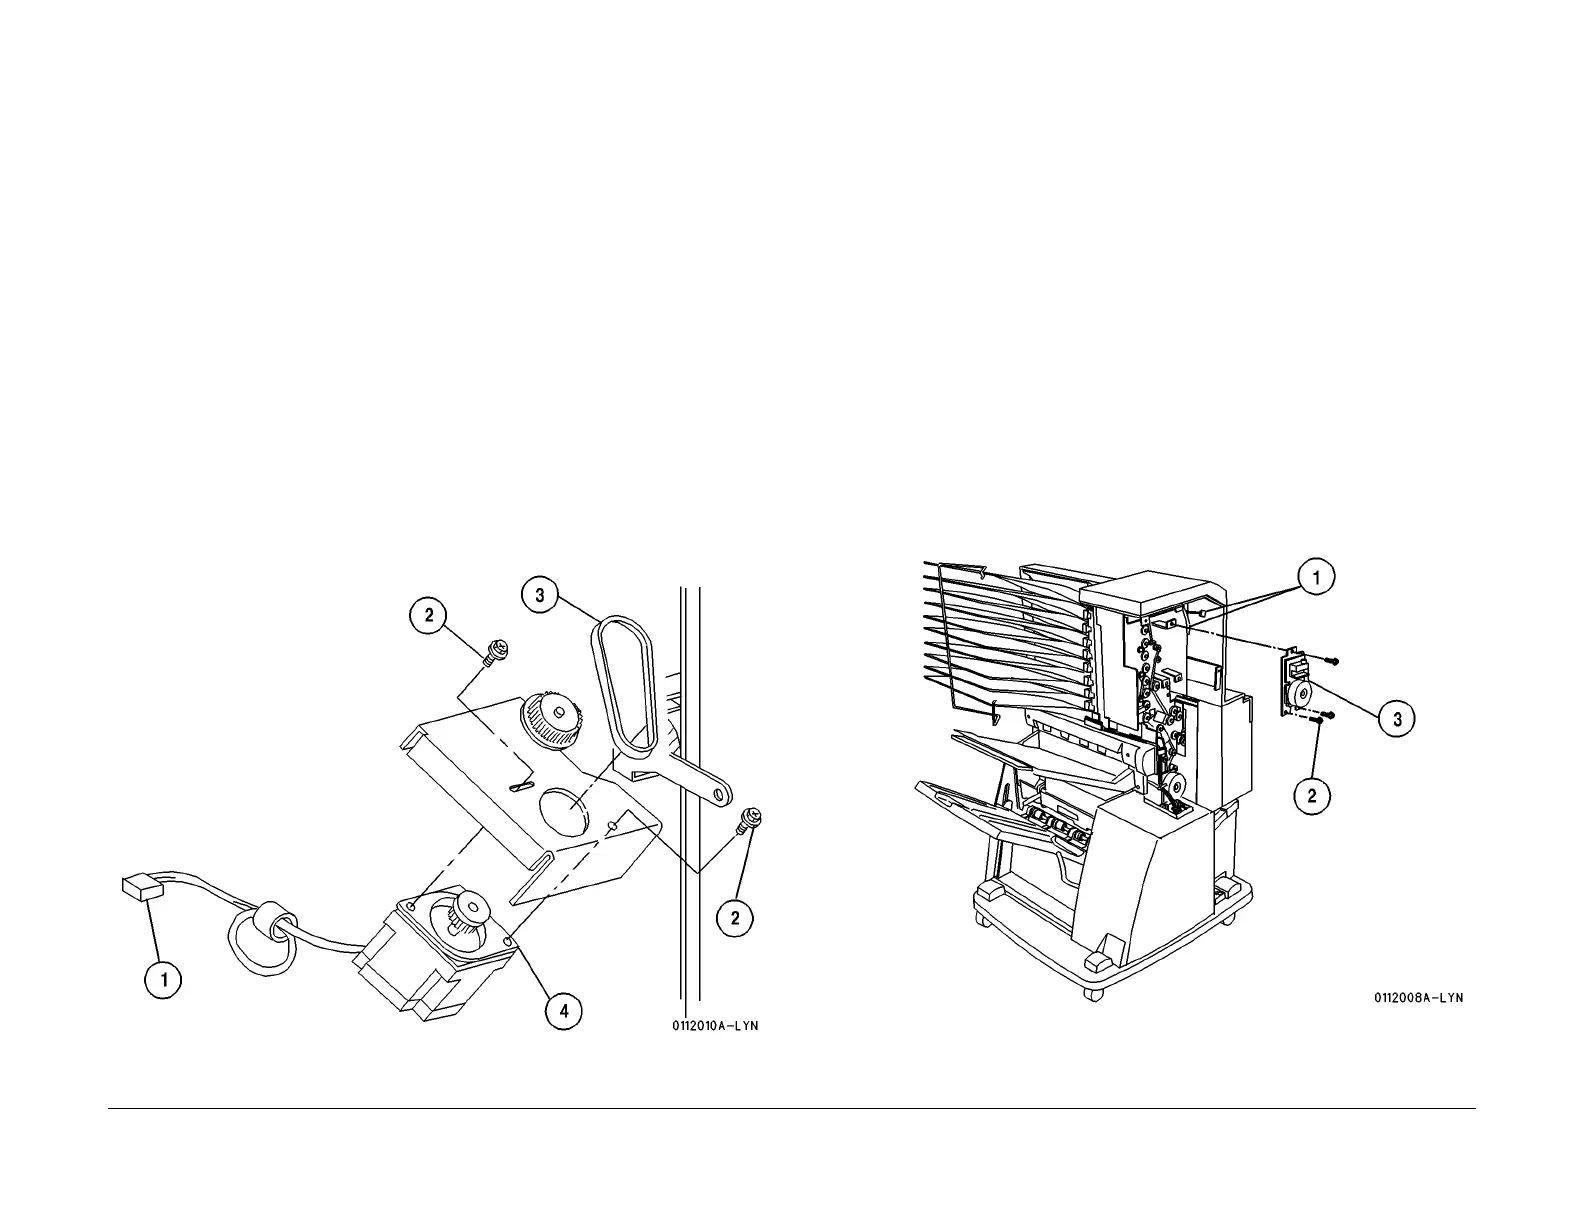
4. Remove the Stapler Position Motor (Figu
re 1).
1. Open the harness clamp securing the wire harness and disconnect the motor con-
nector P/J1089.
2. Remov
e the two screws securing the motor to the motor bracket.
3. Disengage and remove the belt.
4. Remove the Stapler Position Motor.
Replacement
1. Install the Stapler Position Motor onto the motor bracket.
2. Place the drive belt onto the gear.
3. Bring the motor into position and engage the belt and the motor drive gear.
4. Secure the motor with the screws.
Figure 1 Remove the Stapler Position Motor
REP 15.3.20 Mailbox Drive Motor
Parts List on PL 18.10
Removal
WARNING
To avoid personal injury or shock, disconnect the Finisher cable connector. Switch off
the machine power and disconnect the machine Power Cord.
1. Switch off the printer power and disconnect the AC Power Cord.
2. Remove the Rear Upper Cover (REP 1
5.3.7).
3. Remove the Mailbox Drive Motor (Figur
e 1).
1. Disconnect the P/J1021 f
rom the connector on the motor PWB.
2. Remove the two screws at the bottom of the motor bracket.
3. While holding the motor bracket, remove the top screw from the bracket and remove
the M
ailbox Drive Motor.
Replacement
1. Engage the teeth of the motor gear onto the Mailbox Drive Belt and ensure that the motor
shaft is installed into the hole in the frame.
2. Secure the motor bracket with the three screws.
3. Rotate the motor in order to ensure that the drives are engaged correctly.
4. Reconnect P/J
1021.
Figure 1 Remove the Mailbox Drive Motor
 Loading...


