1/05
8d-118
DocuColor 12/DCCS50
REP 15.3.15, REP 15.3.16
Reissue
Finisher/Sorter
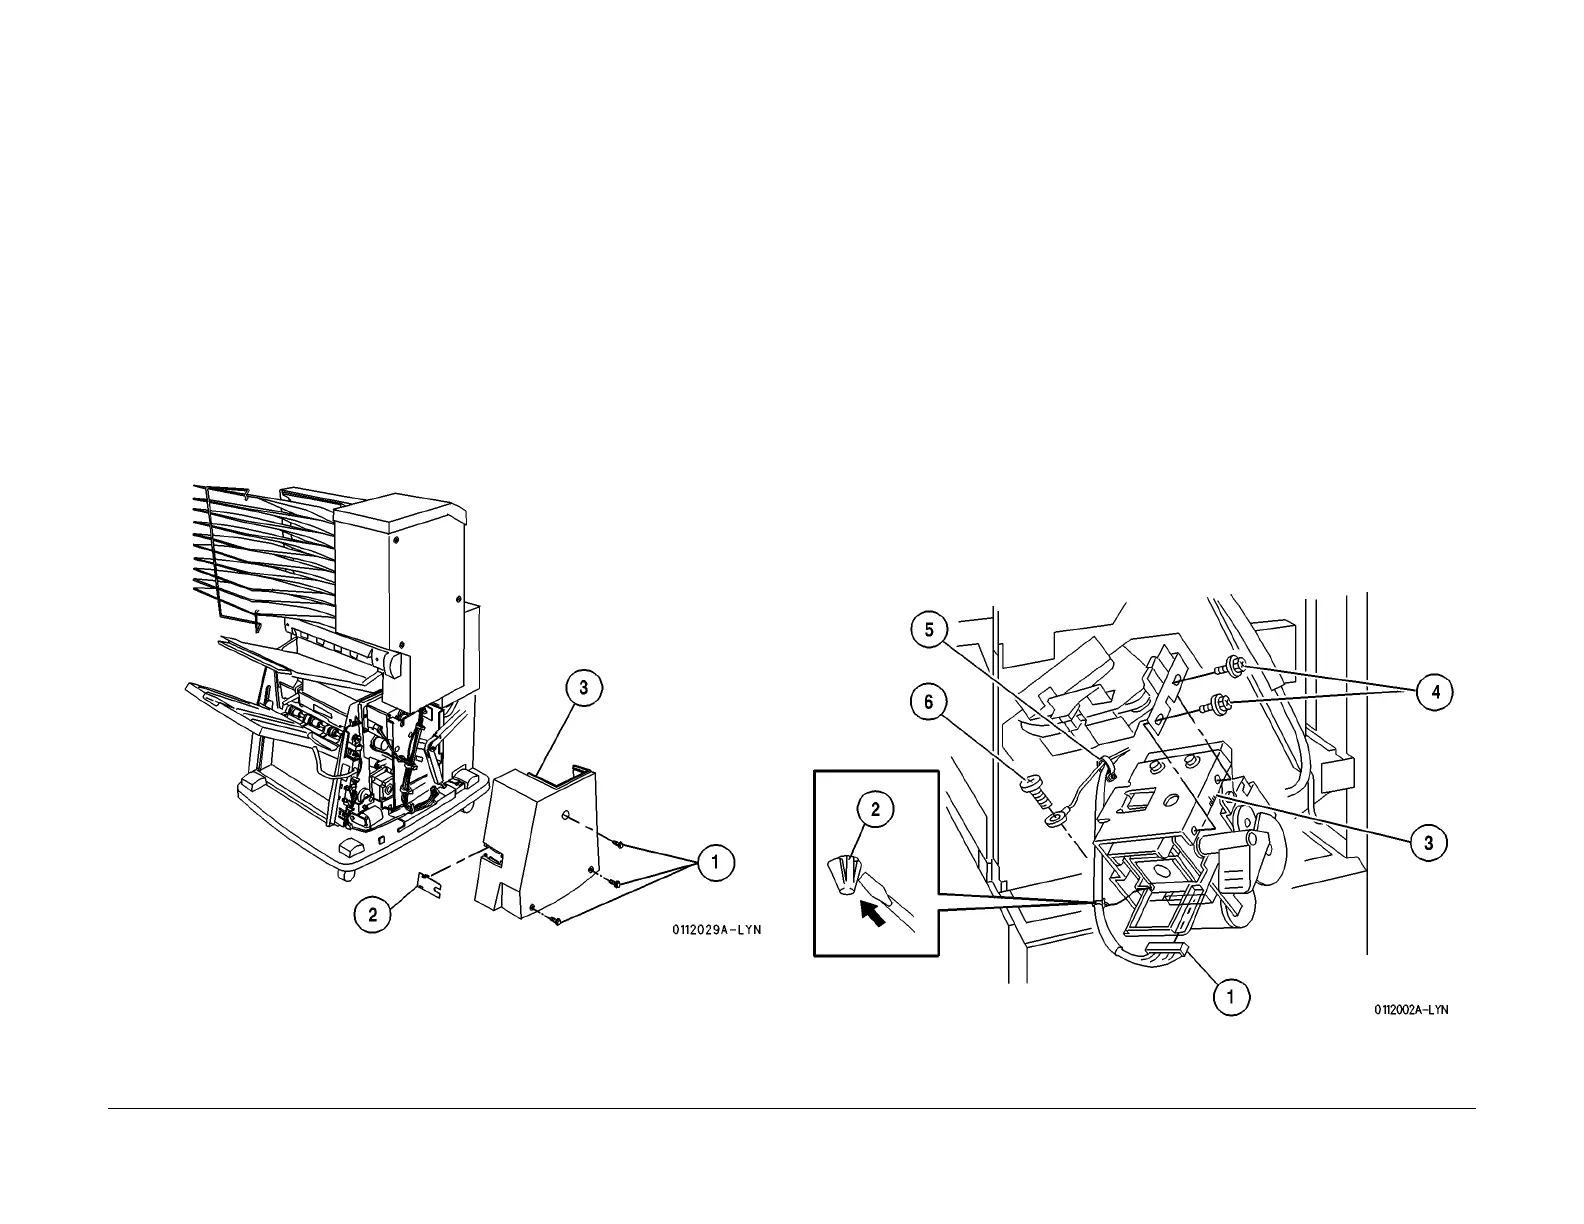
REP 15.3.15 Rear Lower Cover
Parts List on PL 18.3
Removal
WARNING
To avoid personal injury or shock, disconnect the Finisher cable connector. Switch off
the machine power and disconnect the machine Power Cord.
1. Switch off the printer power and disconnect the AC Power Cord.
2. Remove the Rear Upper Cover (REP 15.3.
7).
3. Remove the Rear Lower Cover (Figur
e 1).
1. Remove the three screws securing the Rear Lower Cover.
2. Snap off the Rear Panel securing the wire harness to the cover.
3. Lift up and remove the Rear Lower Cover.
Replacement
1. Place the cover back into position and secure it with the three screws.
2. Align the wire harness into the cutout of the Rear Panel and snap the Rear Panel into
place.
Figure 1 Remove the Rear Lower Cover
REP 15.3.16 Stapler Assembly
Parts List on PL 18.17
Removal
WARNING
To avoid personal injury or shock, disconnect the Finisher cable connector. Switch off
the machine power and disconnect the machine Power Cord.
1. Switch off the printer power and disconnect the AC Power Cord.
2. Remove the Stapler Cover Assembly (REP 15.3.
3).
3. Reach in from the side and pull the Stapler Assembly to the front of the Finisher, if
required.
4. Remove the Stapler Assembly (Figure 1
).
1. Disconnect P/J1092
from the Stapler Assembly.
2. Release the harness clip from the side of the Stapler Assembly.
3. Observe the orientation of the scribe lines so that the Stapler Assembly can be repo-
sitioned correctly during the replacement.
4. Remove the two screws securing the Stapler Assembly to the Slider Bracket, and
remove t
he Stapler Assembly.
5. Release the wire harness from the harness clip near t
he rear of the Stapler Assem-
bly.
6. Remove the screw to remove the green ground wire.
Figure 1 Remove the Stapler Assembly
manuals4you.commanuals4you.com

 Loading...


