1/05
8d-112
DocuColor 12/DCCS50
REP 15.3.3, REP 15.3.4
Reissue
Finisher/Sorter
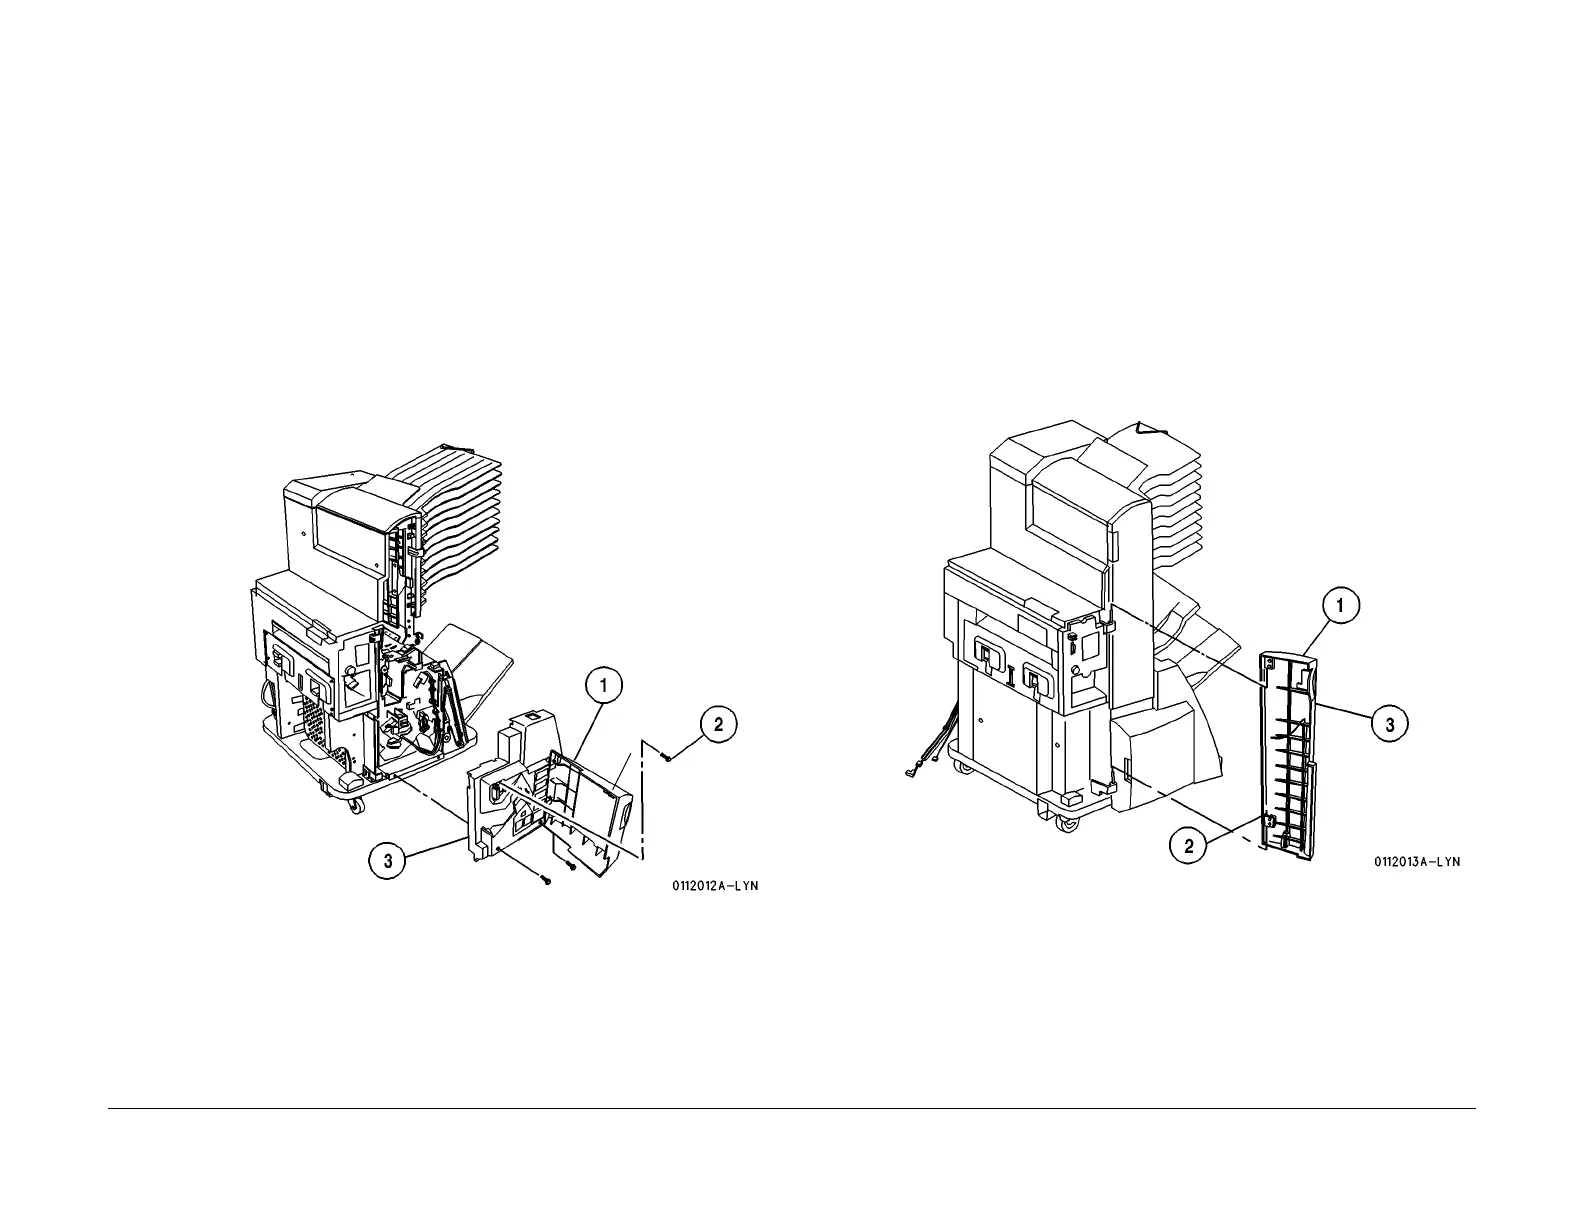
REP 15.3.3 Stapler Cover Assembly
Parts List on PL 18.2
Removal
WARNING
To avoid personal injury or shock, disconnect the Finisher cable connector. Switch off
the machine power and disconnect the machine Power Cord.
1. Switch off the printer power and disconnect the AC Power Cord.
2. Remove the Mailbox Door Assembly (REP 15.
3.5).
3. Remove the Stapler Cover Assembly (Figu
re 1).
1. Open the Stapler Door Assembly.
2. Remove the three screws securing the Cover Assembly.
3. Lift and pull to remove the Stapler Cover Assembly.
Replacement
1. Reinstall the Stapler Cover Assembly in the reverse order of removal.
Figure 1 Remove the Stapler Cover Assembly
REP 15.3.4 Decurler Door Assembly
Parts List on PL 18.2
Removal
WARNING
To avoid personal injury or shock, disconnect the Finisher cable connector. Switch off
the machine power and disconnect the machine Power Cord.
1. Switch off the printer power and disconnect the AC Power Cord.
2. Remove the Decurler Door Assembly (Figure 1
).
1. Open the Decurler Door Assembly.
2. Remove the C-clip securing the bottom hinge.
3. Lift and remove the Decurler Door Assembly.
Replacement
1. Reinstall the Decurler Door Assembly in the reverse order of removal.
Figure 1 Remove the Decurler Door Assembly
manuals4you.commanuals4you.com

 Loading...


