1/05
8d-104
DocuColor 12/DCCS50
REP 15.2.27
Reissue
Finisher/Sorter
REP 15.2.27 Paddle Drive Belt
Parts List on PL 18.14
Removal
WARNING
To avoid personal injury or shock, disconnect the Finisher cable connector. Switch off
the machine power and disconnect the machine Power Cord.
1. Switch off the printer power and disconnect the AC Power Cord.
2. Remove the Stapler Cover Assembly (REP 15.3.
3).
3. Remove the Rear Lower Cover (REP 15.3.
15).
4. Remove the Compiler Cover Assembly (REP 15.2.
22).
5. Remove the Eject Pinch Roll Shaft Assembly (REP 15.
2.23).
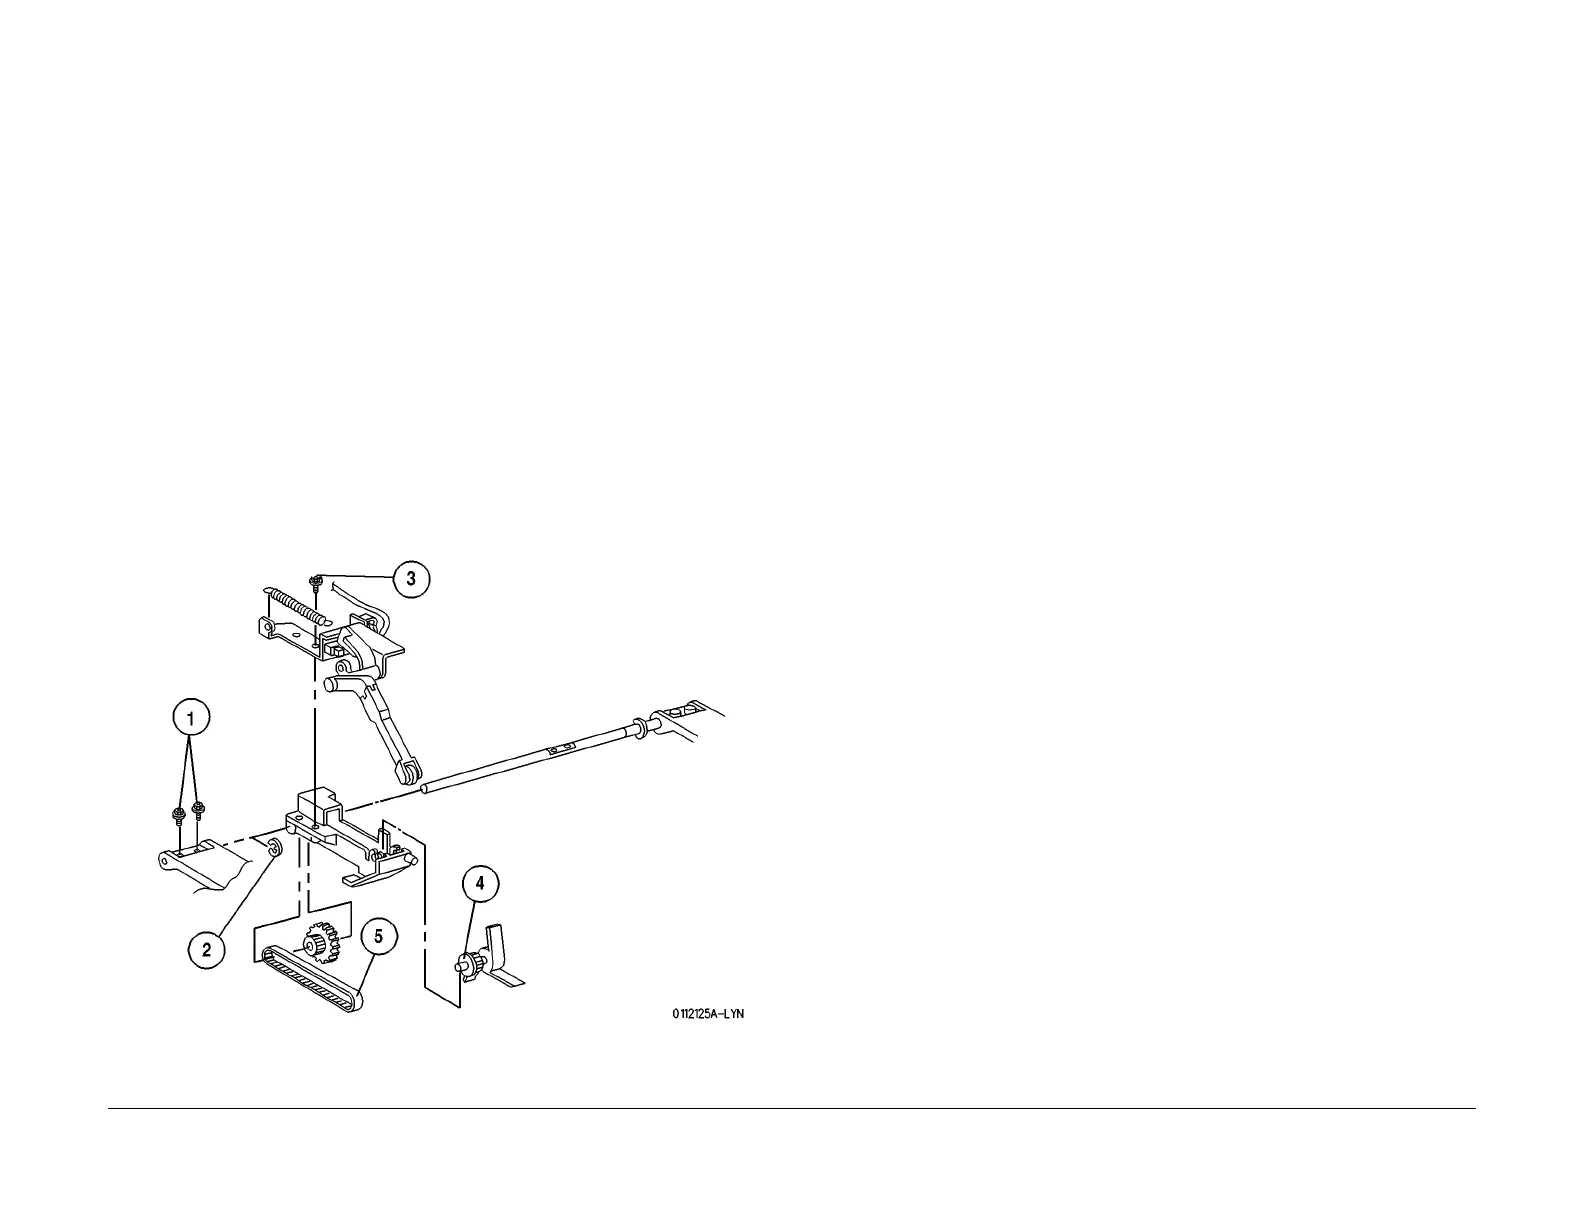
6. Remove the Paddle Drive Belt (Figu
re 1).
1. Remove the two screws securing the Front Pinch Roll Cover to the Eject Pinch Roll
Shaft,
and slide the Cover off of the Shaft.
2. Remove the E-ring securing the Paddle Cover Assembly to the Eject Pinch Roll
Shaft,
and slide the Cover Assembly off of the Shaft.
3. Remove the screw securing the Sensor Bracket to the Paddle Cover Assembly, and
remove t
he Bracket.
4. Remove the Paddle out of the Paddle Cover Assembly.
5. Remove the Paddle Drive Belt.
Figure 1 Remove the Paddle Drive Belt
Replacement
1. Slip the Paddle Drive Belt over the Paddle Gear.
2. Press the Paddle onto the Paddle Cover Assembly.
3. Reinstall the Sensor Bracket Assembly onto the Paddle Cover Assembly, and use the
screw (
1) to secure the Bracket.
4. Reinstall the Drive Gear onto the other end of the Belt, and position the Gear in the Pad-
dle Cover Assembly.
5. Slide the Paddle Cover Assembly onto the Eject Pinch Roll Shaft. Use an E-ring to secure
the
Paddle Cover Assembly to the Eject Pinch Roll Shaft.
6. Slide the Front Pinch Roll Cover onto the Eject Pinch Roll Shaft, and use the screws (2) to
secure
the Cover to the Shaft.
7. Reinstall the Eject Pinch Roll Assembly.
8. Reinstall the Compiler Cover Assembly.
9. Raise and loser the Compiler Cover Assembly to make sure it moves freely, and the Stack
Height Ac
tuator and Pinch Rolls also move freely.
10. Reinstall the Rear Lower Cover.
11. Reinstall the Stapler Cover Assembly.
manuals4you.commanuals4you.com

 Loading...


