1/05
8d-88
DocuColor 12/DCCS50
REP 15.2.12
Reissue
Finisher/Sorter
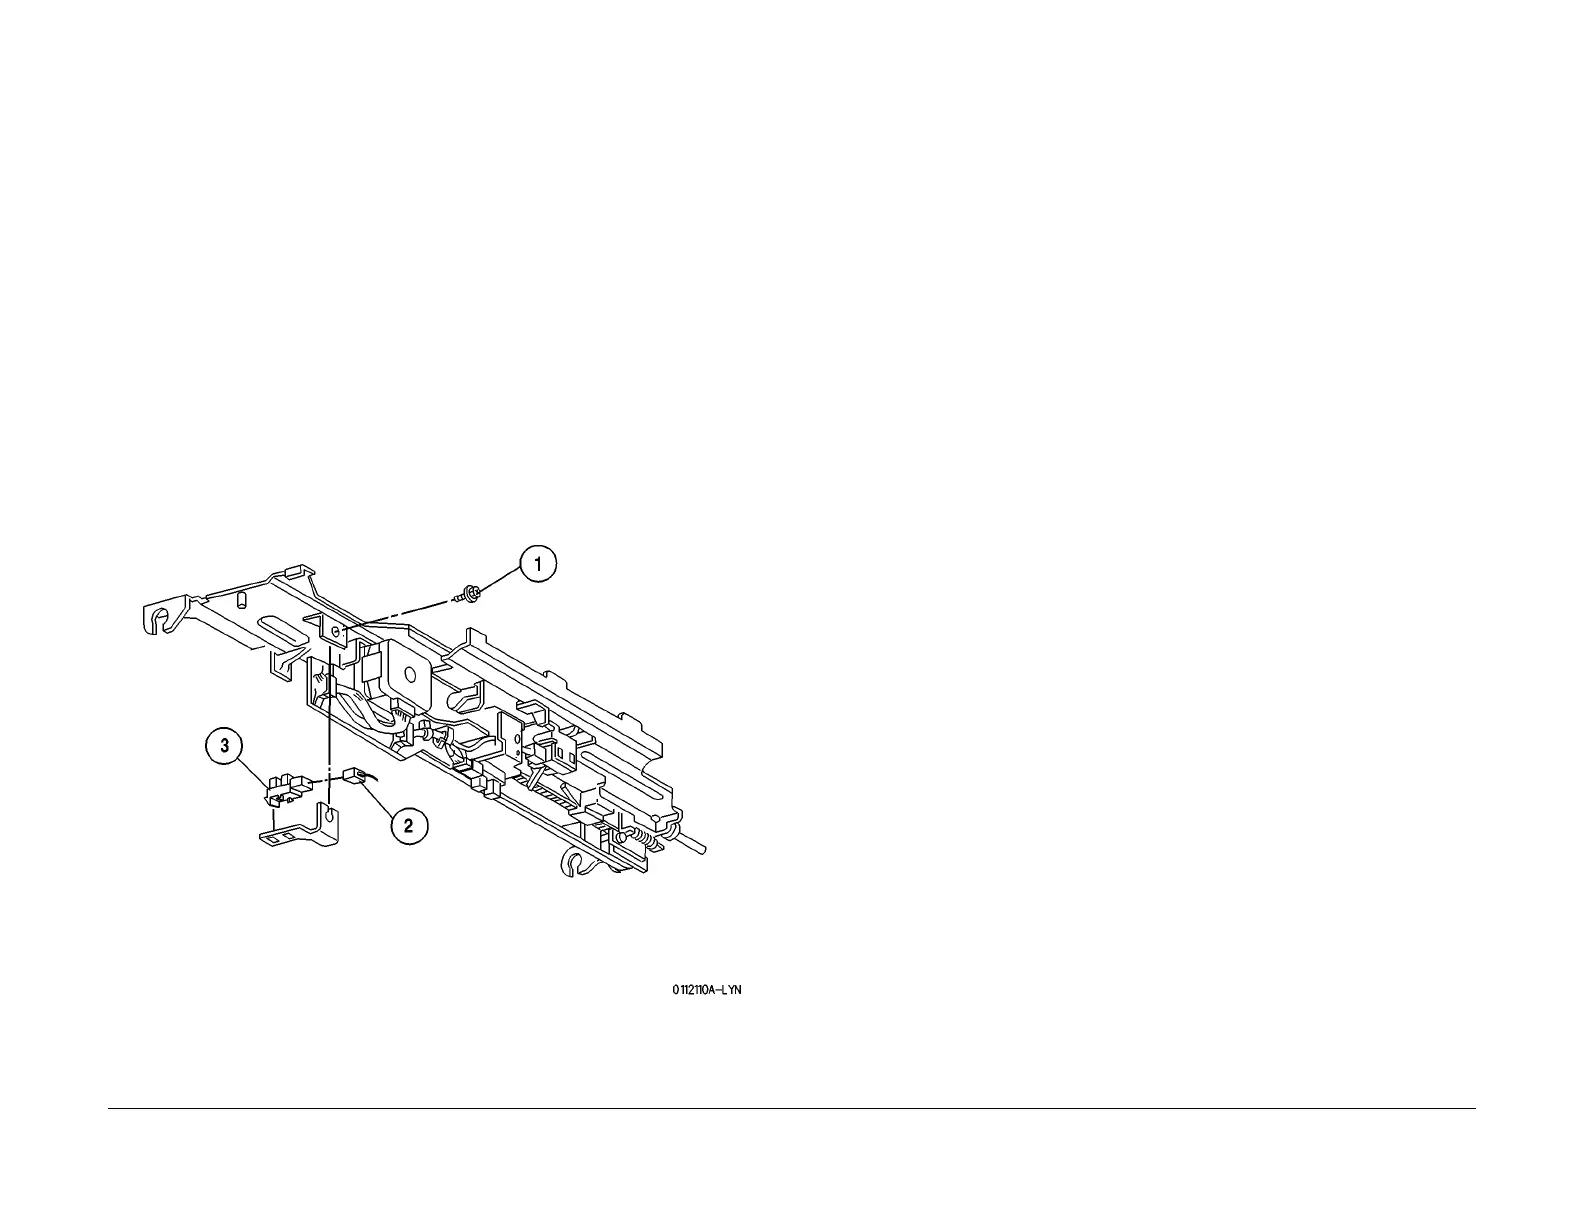
REP 15.2.12 Tamper Home Sensor
Parts List on PL 18.16
Removal
WARNING
To avoid personal injury or shock, disconnect the Finisher cable connector. Switch off
the machine power and disconnect the machine Power Cord.
1. Switch off the printer power and disconnect the AC Power Cord.
2. Disconnect the Finisher from the Printer.
3. Remove the Stapler Cover Assembly (REP 15.3.
3).
4. Remove the Rear Lower Cover (REP 15.3.
15).
5. Remove the Stacker Tray Assembly (REP 15.2.
2).
6. Remove the screws (4) securing the Tie Plate to the Finisher Frame. Remove the Tie
Plate.
7. Remov
e the Tamper Home Sensor (Figu
re 1).
1. Loosen the screw (1) securing the Tamper Home Sensor Bracket to the Compiler
and remove t
he Bracket along with the Tamper Home Sensor.
2. Disconnect P/J10
45 from the Sensor.
3. Press in and release the Sensor latches that are securing the Sensor to the Bracket,
and remov
e the Sensor.
Figure 1 Remove the Tamper Home Sensor
Replacement
1. Position the Tamper Home Sensor into the Sensor cutout in the Sensor Bracket.
2. Connect P/J104
5 to the Sensor.
3. Reinstall the Tamper Home Sensor Bracket onto the Compiler and use the screw (1) to
secure t
he Bracket.
4. Reinstall the Tie Plate and use the screws (4) to secure it to the frame.
5. Reinstall the Stacker Tray Assembly.
6. Reinstall the Stapler Cover Assembly.
7. Install the Rear Lower Cover.
8. Connect the Finisher to the Printer.
manuals4you.commanuals4you.com

 Loading...


