1/05
8d-108
DocuColor 12/DCCS50
REP 15.2.32
Reissue
Finisher/Sorter
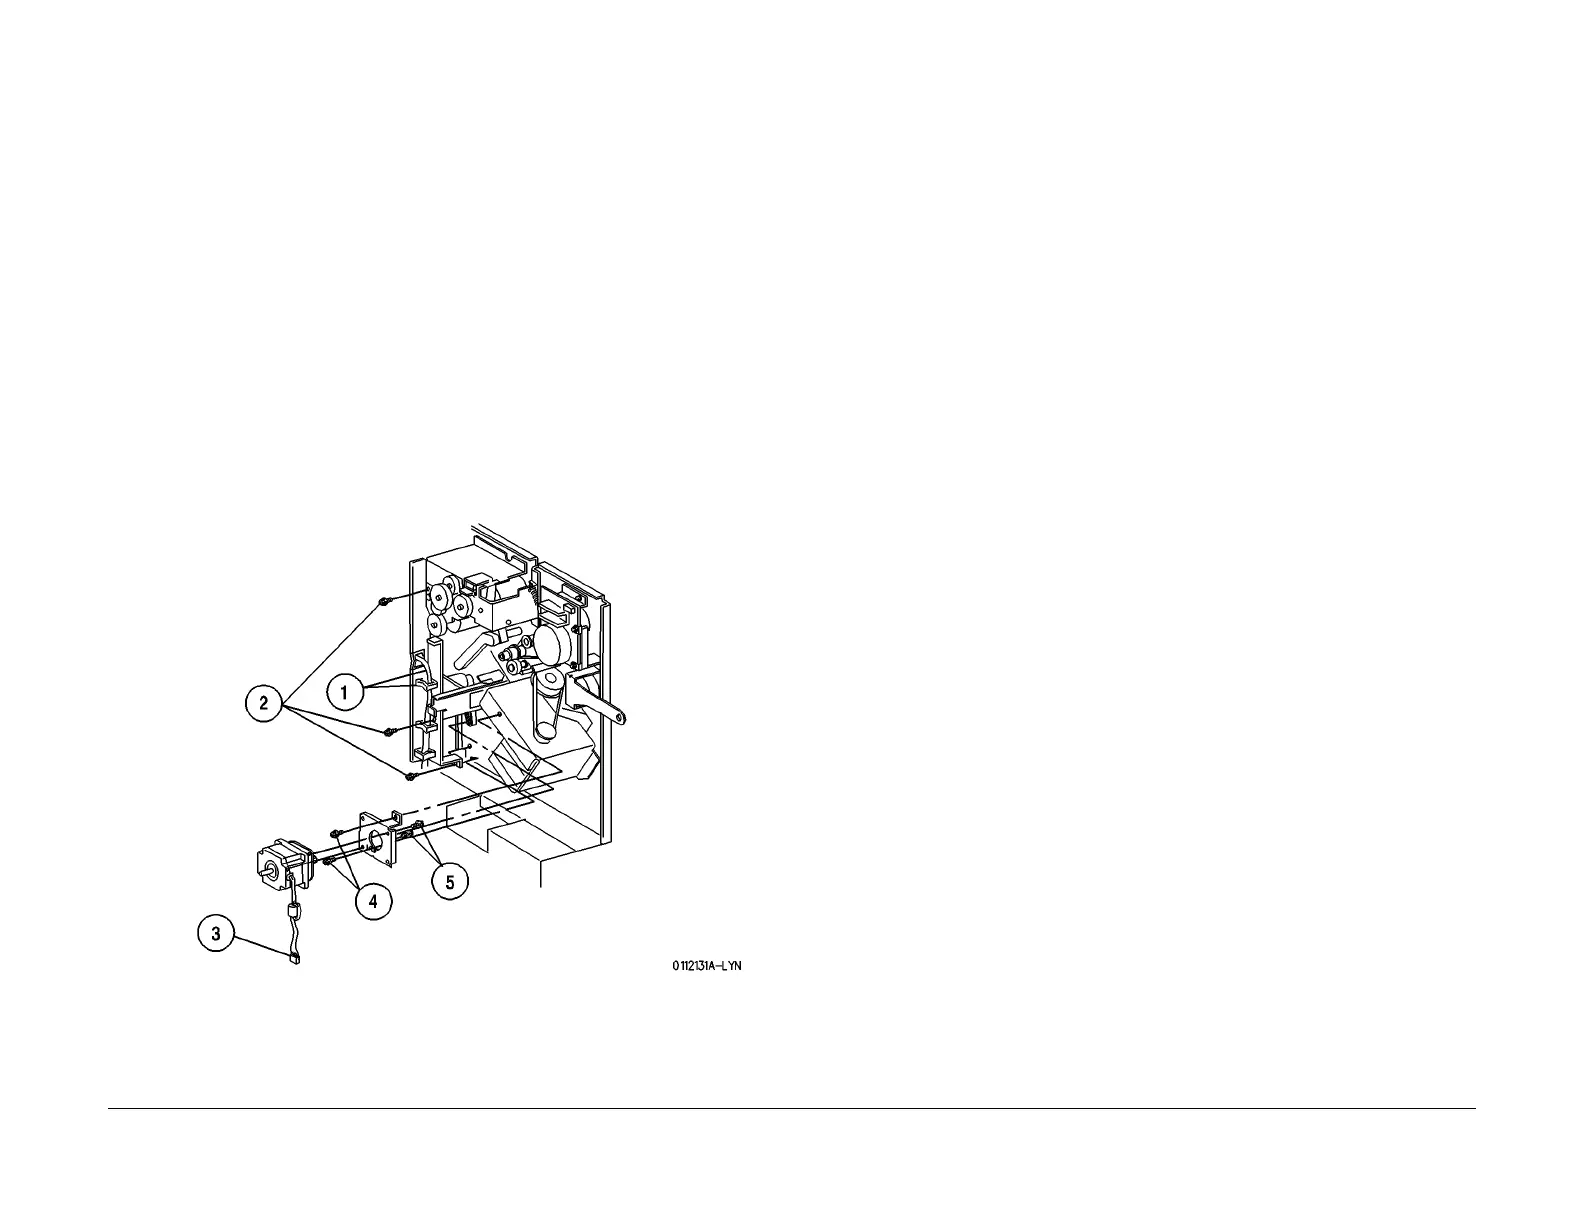
REP 15.2.32 Eject Motor
Parts List on PL 18.19
Removal
WARNING
To avoid personal injury or shock, disconnect the Finisher cable connector. Switch off
the machine power and disconnect the machine Power Cord.
1. Switch off the printer power and disconnect the AC Power Cord.
2. Roll the Finisher away from the printer until it stops.
3. Remove the Rear Lower Cover (REP 15.3.
15).
4. Remove the Eject Motor (Figu
re 1).
1. Free the wire harnesses that run the length of the Harness Bracket.
2. Remove the screws (3) securing the Harness Bracket to the Finisher frame, and
remove t
he Bracket.
3. Disconnect P/J10
91.
4. Remove the screws (2) securing the Eject Motor Bracket to the Finisher frame.
5. Slip the Motor shaft pulley free of the Eject Motor Drive Belt, and remove the Bracket
and Motor
. Remove the screws (2) securing the Eject Motor to the Motor Bracket,
and remove the Motor.
Figure 1 Remove the Eject Motor
Replacement
1. Position the Eject Motor against the Eject Motor Bracket. Use the screws (2) to secure the
Motor to the Bracket.
2. Reinstall the Motor Bracket onto the Finisher frame, making sure to loop the free end of
the
Eject Motor Drive Belt over the Motor shaft pulley. Use the screws (2) to secure the
Eject Motor Bracket to the Finisher frame, but do not tighten the screws at this time.
3. Push down slightly on the Eject Motor, to apply t
ension to
the Drive Belt, and hold the
Motor down while tightening the screws (2) securing the Bracket to the frame.
4. Reconnect P/J
1091.
5. Reinstall the Harness Bracket to the Finisher frame,
and use the screws (3) to secure it to
the frame.
6. Route the wire harnesses through the clips that run the length of the Harness Bracket.
7. Reinstall the Rear Lower Cover.
8. Reconnect the Finisher to the Printer.
manuals4you.commanuals4you.com

 Loading...


