1/05
9-11
DocuColor 12/DCCS50
Edit Pad-to-IOT Mounting Kit Installation
Installation Instructions
Reissue
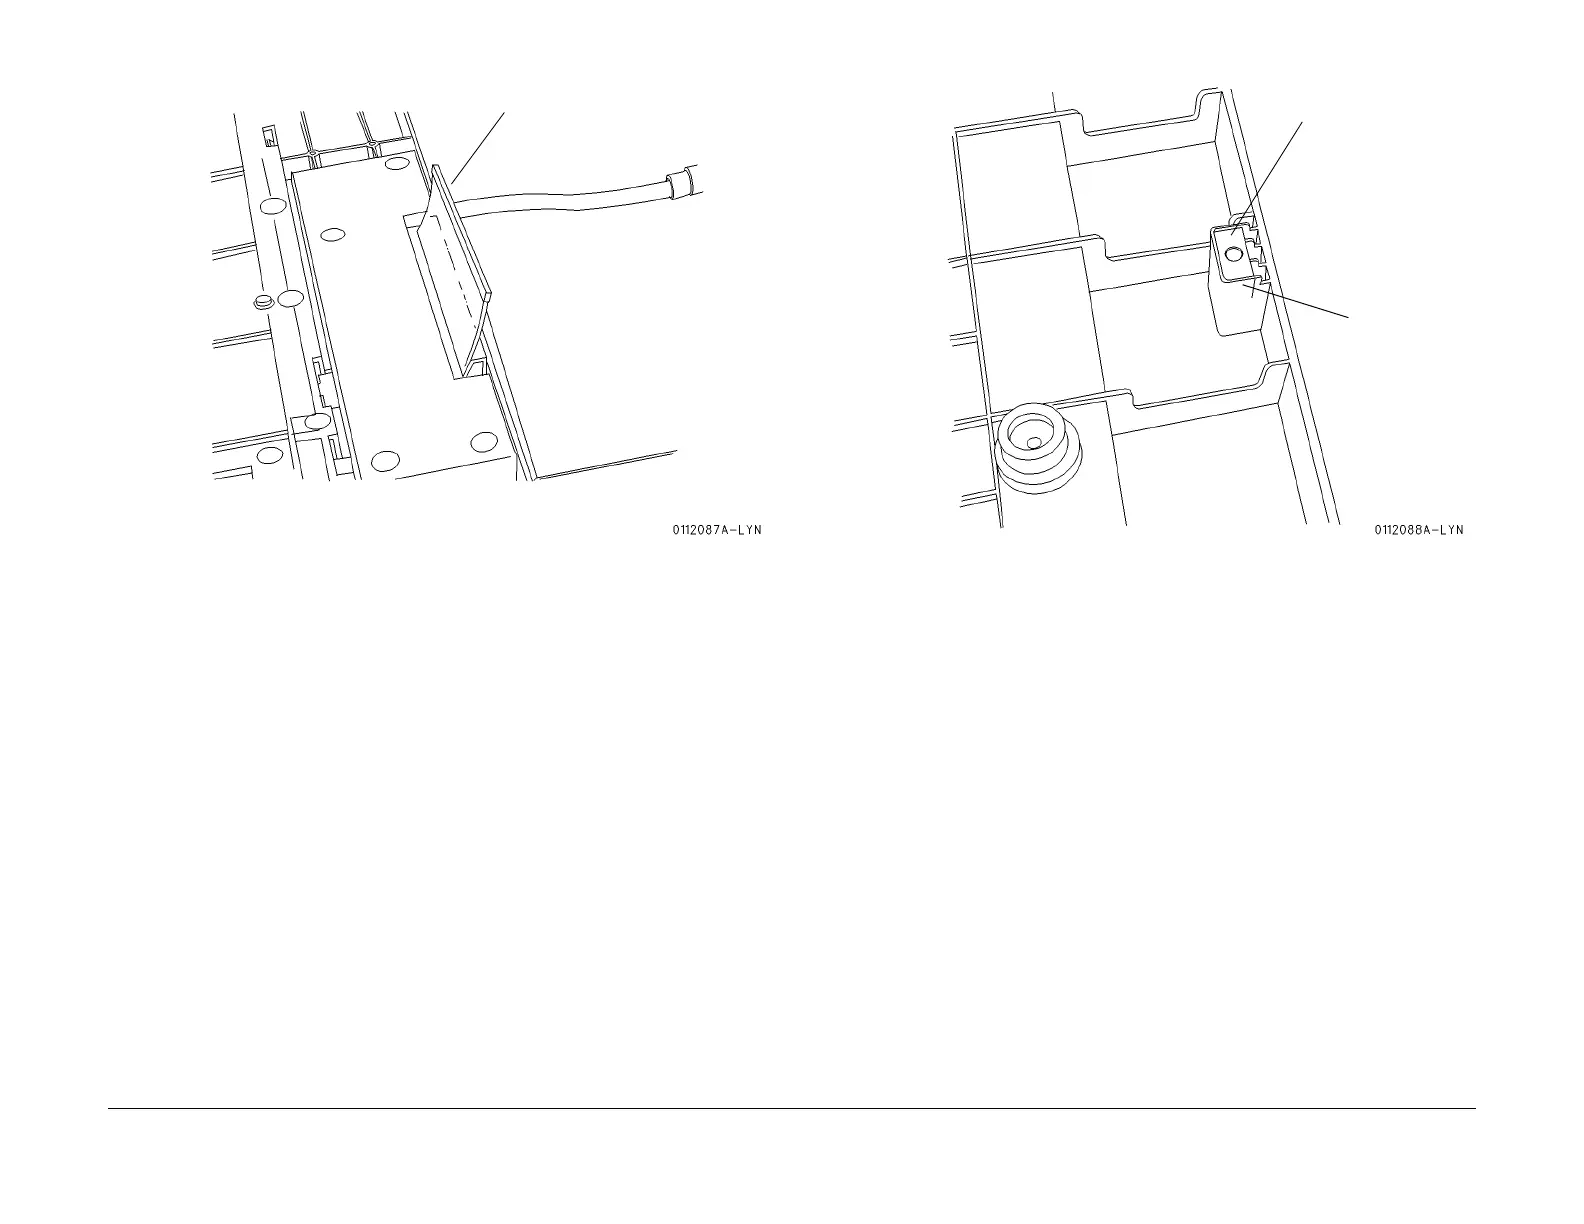
Figure 4 Install the Stopper
6. Install the Magnet (Figu
re 5).
a. Slide the Magnet, with proper orientation - white marking, into the slot in the Cover.
b. Place a small amount of Epoxy Adhesive along the post of the Cover. Allow the
adhesive to
set.
Figure 5 Install the Magnet
7. Disconnect the DADF Wire Harness (PL 12.3
) from the IOT.
8. Remove the two Knob Screws. (PL 12.3).
9.
Lift the DADF off the IOT and set aside.
10. Install two Blind Covers (PL 11
.1).
11. Install the Edit Pad onto the IOT. Leave the assembly in the up (open) position.
12. Insure that the Edit Pad Harness is connected to the IOT.
13. Install the Platen Cushion (refer to REP 1
1.1.1)
a. Place the Platen Cushion against the registration edges on the Platen Glass with the
adhesive side of
the Cushion facing UP.
b. Remove the peel-off adhesive backing from the Cushion.
c. Position the Edit Pad to the down (closed) positio
n and press on the Edit Pad Cover
to insure adhesion of the Cushion to the bottom of the Edit Pad Cover.
14. Reconnect the power cord and switch on the power.
NOTE: MAX Set Up is not required. DO NOT adjust NVM location 715-125.
Stopper
Remove the peel-off
adhesive backing.
Magnet
Orientation
Mark

 Loading...


