1/05
4-115
DocuColor 12/DCCS50
REP 8.1.1
Repairs and Adjustments
Reissue
REP 8.1.1 Fuser Unit
Parts List on PL 8.1
Removal
NOTE: After replacing the Fuser Unit, clear all HFSI counters related to the Fuser.
WARNING
Turn power off and disconnect the power plug.
CAUTION
Since the Fuser is very hot, wait until the Fuser becomes sufficiently cold.
1. Open the Front Door.
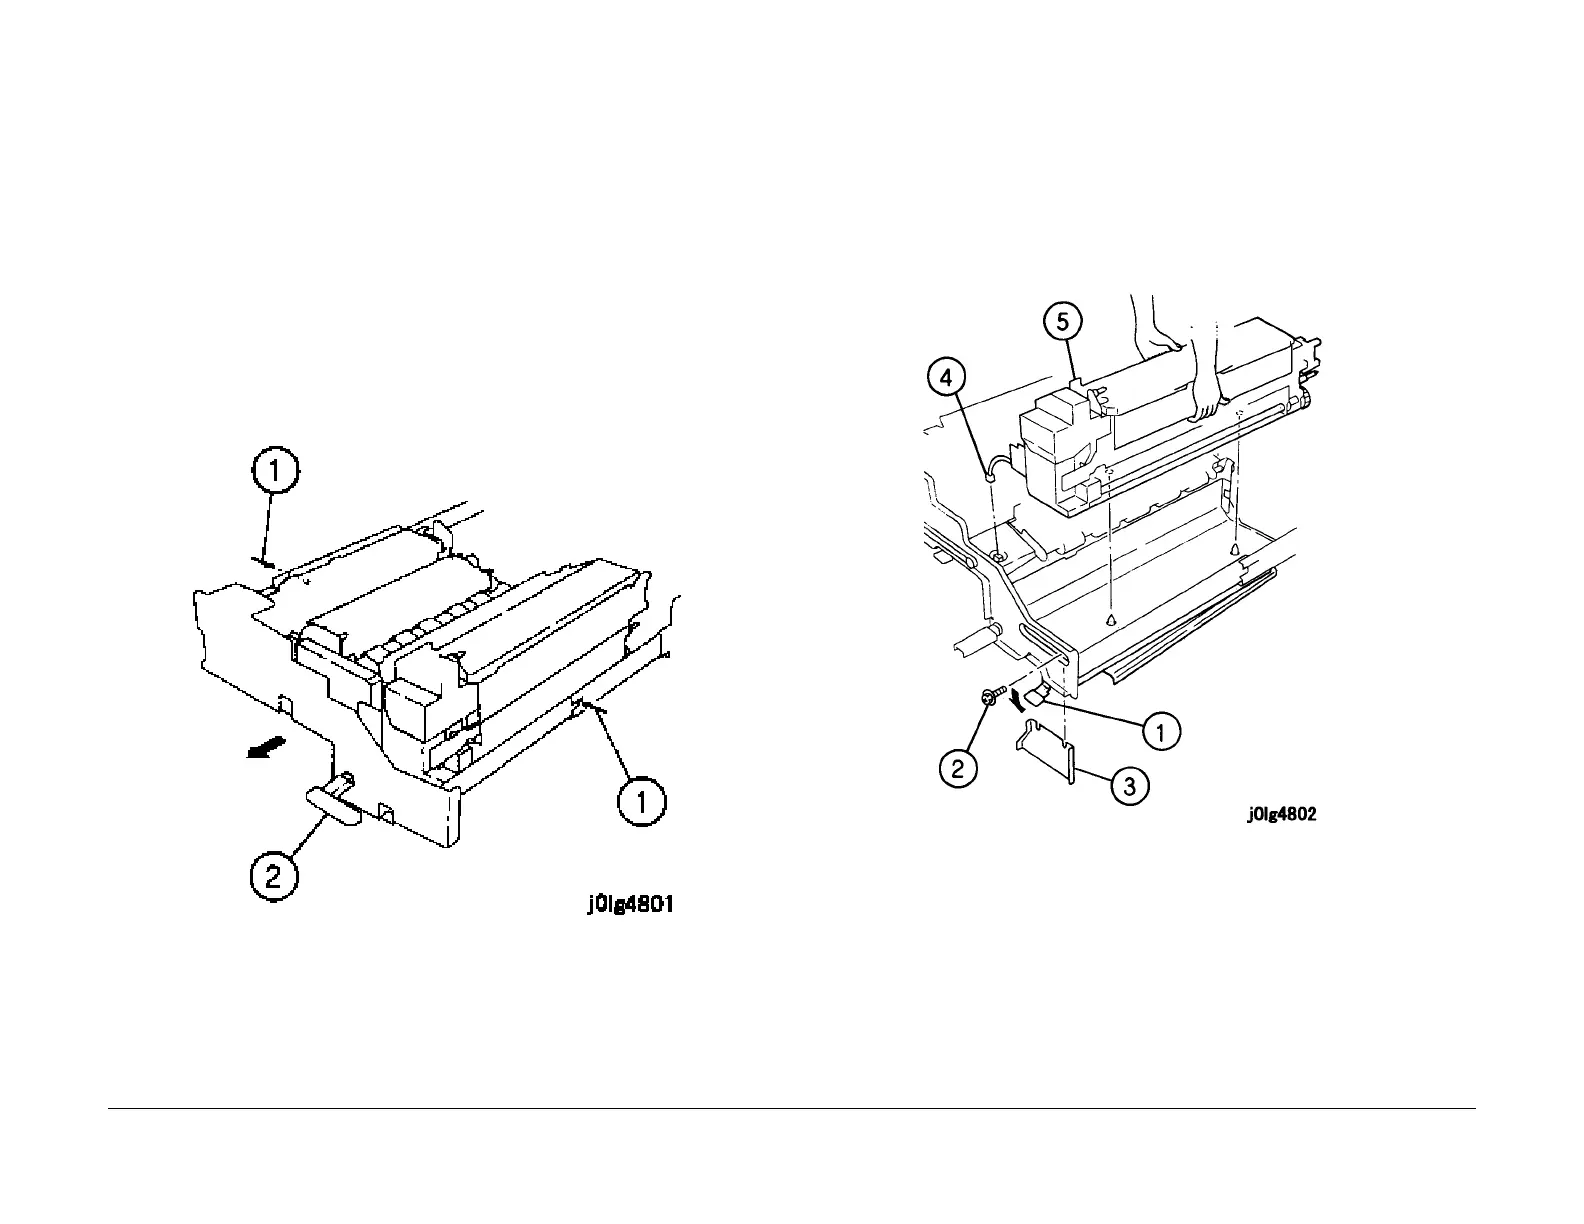
2. Push the lever down and pull out the Drawer Assembly.
3. Pull the Drawer Assembly out to a maintenance position (F
igure 1
).
1. Push in the stoppers at both sides.
2. Pull out the Drawer Assembly.
Figure 1 Pull out the Drawer Assembly
NOTE: Spread a drop cloth on the floor before removing the Oil Cartridge, in order to
avoid any spil
ls.
4. Remove the following parts:
1. Lever (PL
2.
22)
2. Drawer Cover (PL 2.18)
3. O
il Cartridge (PL 8.1)
5. Remove the Fuser Unit (Figure 2
).
1. Lower the baffle.
2. Loosen the screws (2).
3. Remove the bracket.
4. Disconnect the connector.
5. Remove the Fuser Unit.
Figure 2 Remove the Fuser Unit
Installation
NOTE: Make sure to re-connect the connector when the Fuser Unit is installed.
1. Reinstall the parts in the reverse order of disassembly.
2. Perform the Full Fuser Break-In Procedure (GP
1 Fuser Break-In Procedure).
3. Perform the Fuser Nip adjustment (ADJ 8.
1.1).

 Loading...


