1/05
8d-85
DocuColor 12/DCCS50
REP 15.2.9, REP 15.2.10
Finisher/Sorter
Reissue
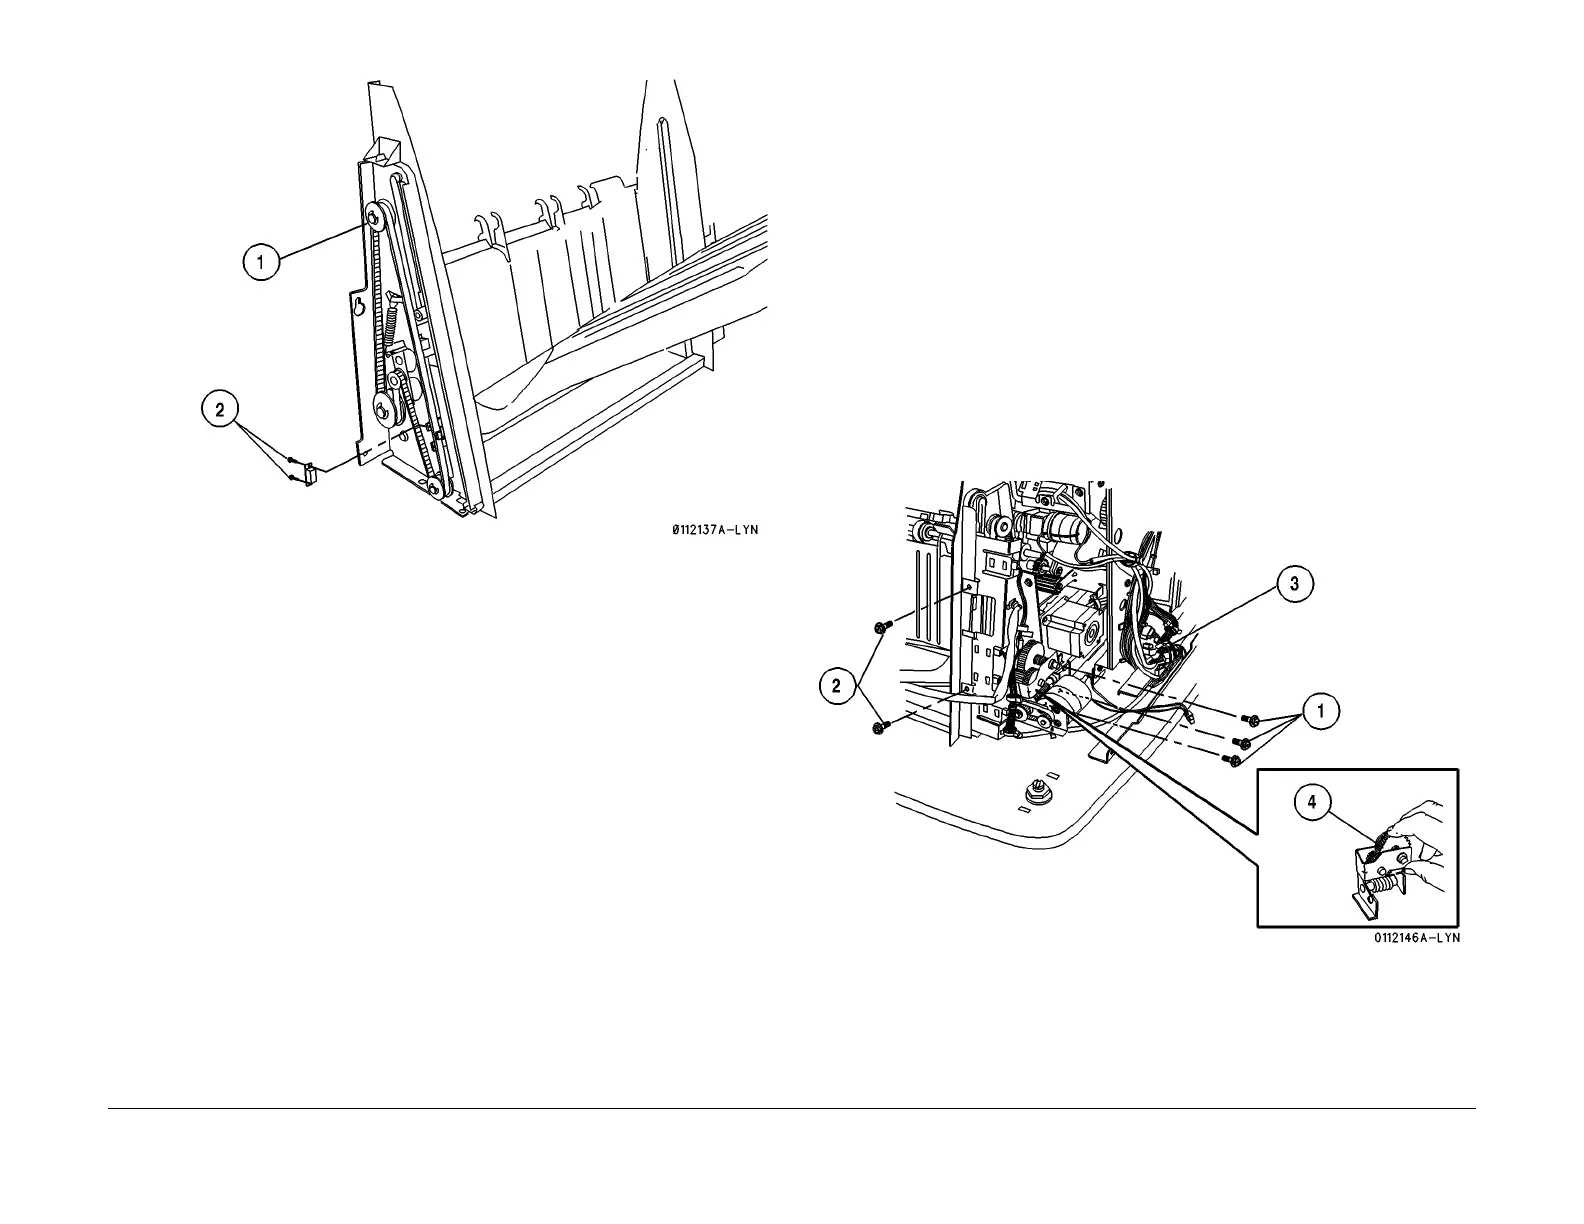
Figure 2 Remove the Front Stacker Tray Drive Belt
3. To remove the Rear Stacker Tray Drive Belt, raise the Stacker Tray to the top of the
stacker.
Remove the screws (2) from the Rear Stacker Tray Drive Belt Clamp (Figure 2).
4. Remove the E-ring from the top rear Pulley and remove the Flange.
5. Support the Stacker Tray with one hand and pull the Rear Belt and the Belt Clamp from
the T
ray bracket.
6. Remove the Belt Clamp from the Rear Belt.
7. Remove the Rear Belt from the Stacker Tray Assembly.
Replacement
1. Install the front and rear Belts onto the top pulleys and install the Pulley Flanges on the
front and rear pulley and secure with E-rings (2).
2. Reinstall the Stacker Motor Bracket. ensure that the rear Stacker Tray Drive Belt is routed
under th
e Worm Wheel, and secure the Stacker Motor Bracket with screws (3).
3. Reinstall the Sensor Bracket onto the Stacker Frame, ensure the Actuator tab is aligned
properly in the Se
nsor Bracket. Also ensure that the rear Drive Belt Clamp properly
engages the Sensor Actuator. Use the screws (2) to secure the Bracket.
4. Install the Belts Clamps (2) onto the front and rear Stacker Tray Drive Belts.
5. Ensure the Stacker Tray is level with the Stacker Tray Assembly and install the Belt
Clamps int
o the Stacker Tray brackets.
6. Adjust the Stacker Tray Level (ADJ 15.
3.2).
7. Install the Stacker Tray Assembly.
8. Reinstall the Rear Lower Cover.
9. Install the Stapler Cover Assembly.
REP 15.2.10 Stacker Tray
Parts List on PL 18.27
Removal
WARNING
To avoid personal injury or shock, disconnect the Finisher cable connector. Switch off
the machine power and disconnect the machine Power Cord.
1. Switch off the printer power and disconnect the AC Power Cord.
2. Remove the Stacker Tray Assembly (REP 15.2.
2).
3. Removing the Stacker Motor Bracket and Sensor Bracket (Figur
e 1).
1. Remove the screws (3) that secures the Stacker Motor Bracket and set the
Bracket t
o one side.
2. Remove the screws (2) the secures the Sensor Bracket and set the Bracket to one
side.
3. Disconnect the Stacker Tray in line connector P/J1070 fr
om the Sensor Bracket
and remove the wire harness from the harness clamps.
4. Pull the Dog Clutch Gear away from the Dog Clutch Pulley then remove the
Stacker
Motor Bracket.
Figure 1 Removing the Stacker Motor Bracket and Sensor Bracket
4. Removing the Stacker Drive Belt Clamps (Figure 2
).
1. Remove the screws (2) from the Front Drive Belt
Clamp and the Rear Drive Belt
Clamp.

 Loading...


