1/05
8d-131
DocuColor 12/DCCS50
ADJ 15.3.1
Finisher/Sorter
Reissue
ADJ 15.3.1 Staple Position Adjustment
Purpose
The purpose is to ensure that the staples are in the correct position.
Check
1. Run a copy set into the Finisher in the staple mode.
2. Check the staple position (Figu
re 1).
Figure 1 Check the Staple Position
3. To change dimension A, perform Dimension A adjustment.
4. To change dimension B, perform Dimension B adjustment.
Adjustment
Dimension A adjustment
WARNING
To avoid personal injury or shock, disconnect the Finisher cable connector. Switch off
the machine power and disconnect the machine Power Cord.
1. Remove the Stapler Cover Assembly (REP 15.3.
3).
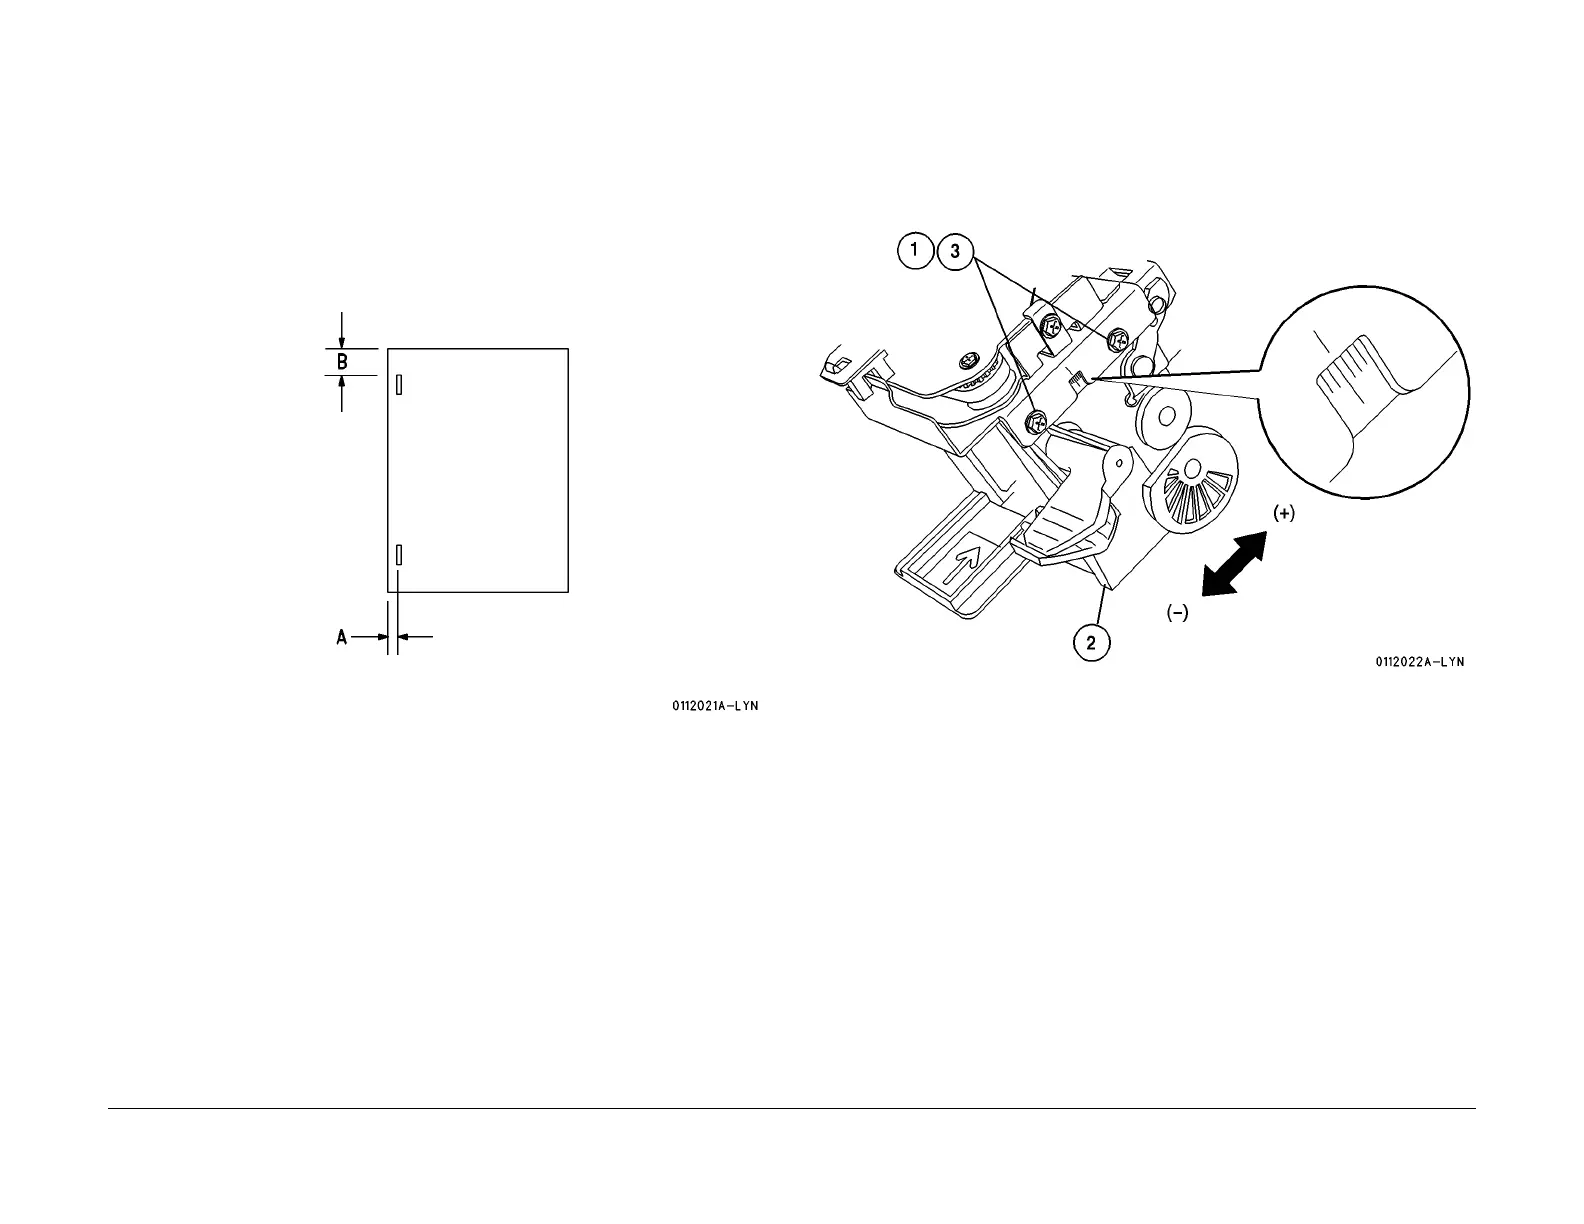
2. Adjust the position of the Stapler Assembly (Figu
re 2).
1. Loosen the two screws.
2. Using the scribe lines as a reference, move the S
tapler Assembly to achieve the
desired dimension. Dimension A changes in increments of approximately 4 mm. To
increase the dimension A, move the stapler in the direction of the (+) sign. To
decrease the dimension A, move the stapler in the direction of the (-) sign (Figure 2).
3. Tighten the two screws.
4. Perform the check again.
Figure 2 Adjust the Staple position (Dimension A)
Adjustment
Dimension B adjustment
WARNING
To avoid personal injury or shock, disconnect the Finisher cable connector. Switch off
the machine power and disconnect the machine Power Cord.
1. Remove the Rear Upper Cover (REP 1
5.3.7).
2. Remove the Rear Lower Cover (REP 1
5.3.15).
3. Adjust the position of the Compiler Tray (Figure
3).
1. Loosen the screw.
2. Using the scribe lines as a reference, move the Com
piler Tray to achieve the desired
dimension. Dimension B changes in increments of approximately 6 mm. To increase
the dimension B, move the tray in the direction of the (+) sign. To decrease the
dimension B, move the tray in the direction of the (-) sign (Figure 3).
3. Tighten the screw.
 Loading...


