1/05
8d-83
DocuColor 12/DCCS50
REP 15.2.7, REP 15.2.8
Finisher/Sorter
Reissue
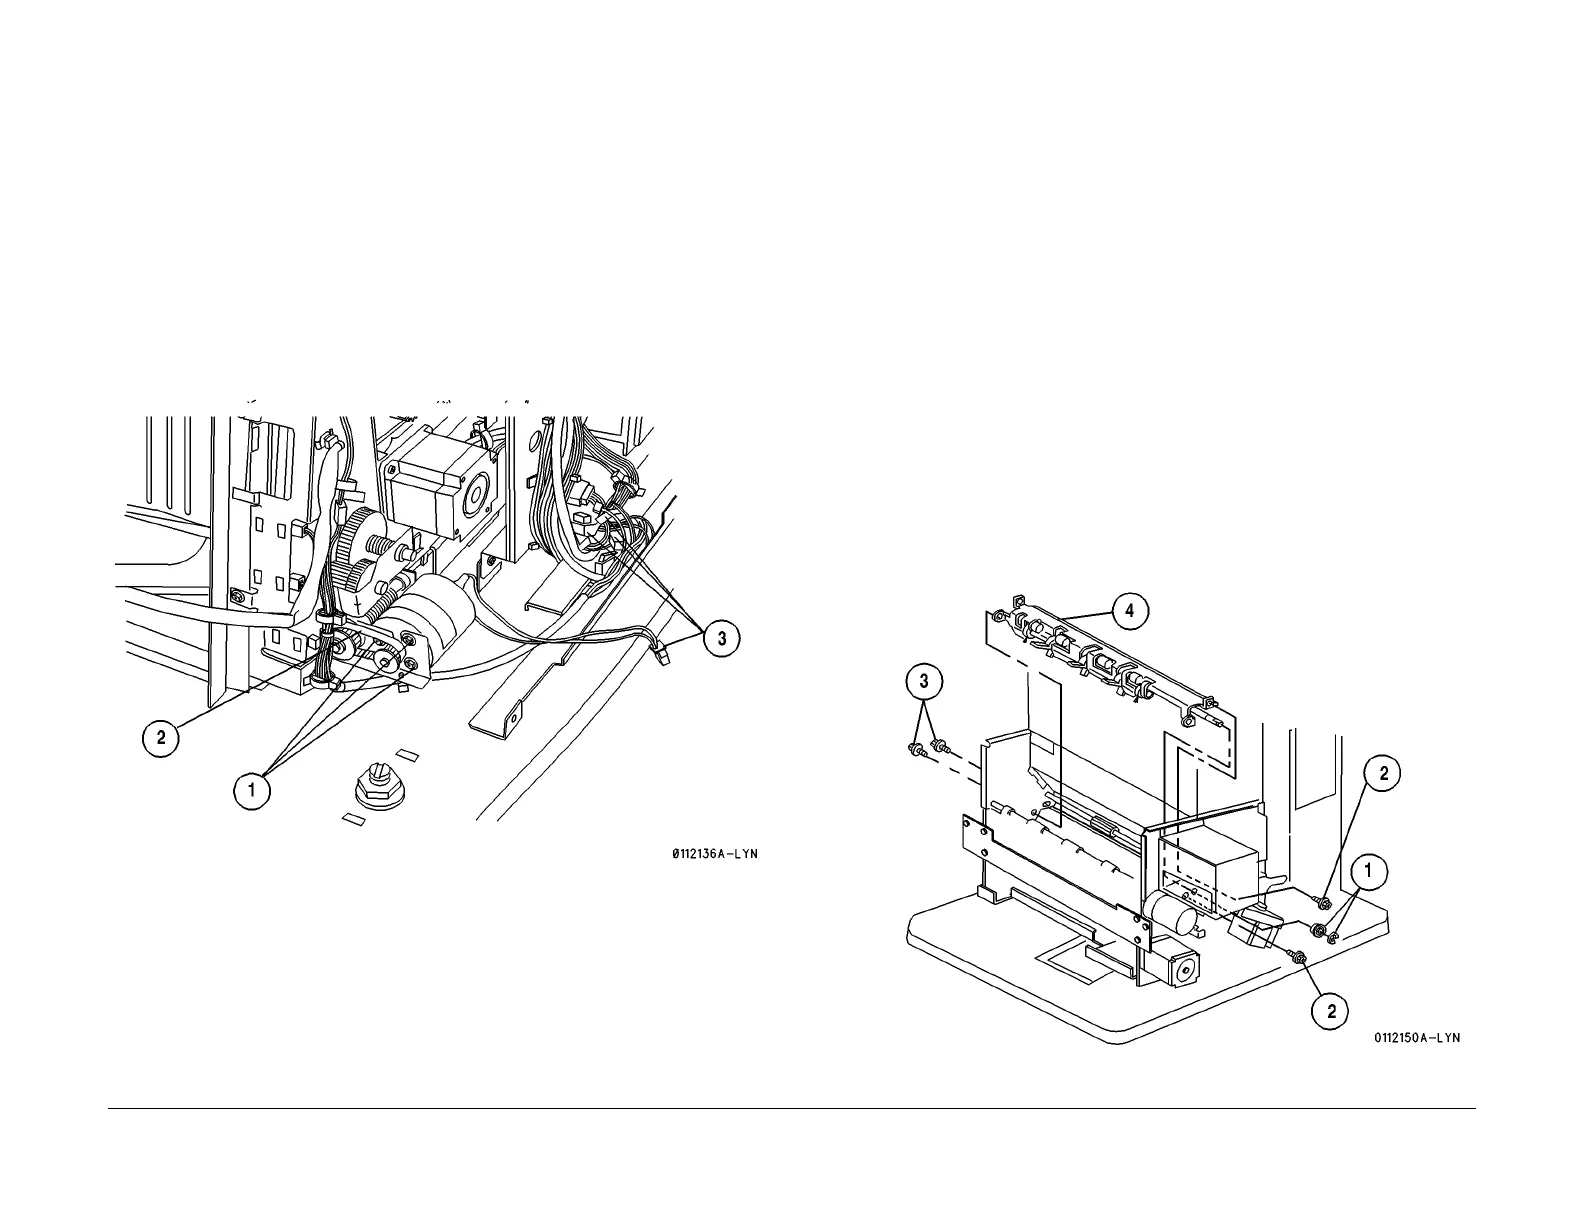
REP 15.2.7 Stacker Motor
Parts List on PL 18.26
Removal
WARNING
To avoid personal injury or shock, disconnect the Finisher cable connector. Switch off
the machine power and disconnect the machine Power Cord.
1. Switch off the printer power and disconnect the AC Power Cord.
2. Remove the Rear Lower Cover (REP 15.3.
15).
3. Remove the Stacker Motor (Figu
re 1).
1. Remove the screws (3) securing the Motor to the Bracket, and remove the Motor.
2. Disengage the Drive Belt from the Motor Pulley.
3. Disconnect P/J1090, r
emove the wire harness from the harness clips and remove
the Motor.
Figure 1 Remove the Stacker Motor
Replacement
1. Engage the Drive Belt then use the screws (3) to secure the Motor.
2. Reconnect P/J
1090.
3. Reinstall the Rear Lower Cover.
REP 15.2.8 Lower Exit Chute Assembly
Parts List on PL 18.14
Removal
WARNING
To avoid personal injury or shock, disconnect the Finisher cable connector. Switch off
the machine power and disconnect the machine Power Cord.
1. Switch off the printer power and disconnect the AC Power Cord.
2. Remove the Stapler Cover Assembly (REP 15.3.
3).
3. Remove the Rear Lower Cover (REP 1
5.3.15).
4. Remove the Compiler Cover Assembly (REP 15.2.
22).
5. Remove the Eject Pinch Roll Shaft Assembly (REP 15.2.
23).
6. Remove the Upper Exit Chute Assembly (REP 15.2.
24).
7. Remove the Exit Roll (REP 15.2.
21).
8. Remove the Compiler Paddle Shaft Assembly (Figure 1
).
1. Remove the E-ring securing the rear bearing to the
Paddle Drive Shaft, and slide the
bearing off the Shaft.
2. Remove the screws (2) securing the Lower Exit Chute Assembly to the rear of the
Finis
her frame.
3. Remove the screws (2) securing the Lower Exit Chute Assembly to the front of the
Finis
her frame.
4. Remove the Lower Exit Chute Assembly.
Figure 1 Remove the Compiler Paddle Shaft Assembly

 Loading...


