1/05
8d-95
DocuColor 12/DCCS50
REP 15.2.19
Finisher/Sorter
Reissue
REP 15.2.19 Eject Bracket Assembly
Parts List on PL 18.21
Removal
WARNING
To avoid personal injury or shock, disconnect the Finisher cable connector. Switch off
the machine power and disconnect the machine Power Cord.
1. Switch off the printer power and disconnect the AC Power Cord.
2. Move the Finisher away from the Printer.
3. Remove the Rear Lower Cover (REP 15.3.
15).
4. Remove the Eject Clamp Sensor (REP 15.2.
17).
5. Remove the Stacker Offset Home Sensor (REP 1
5.2.18).
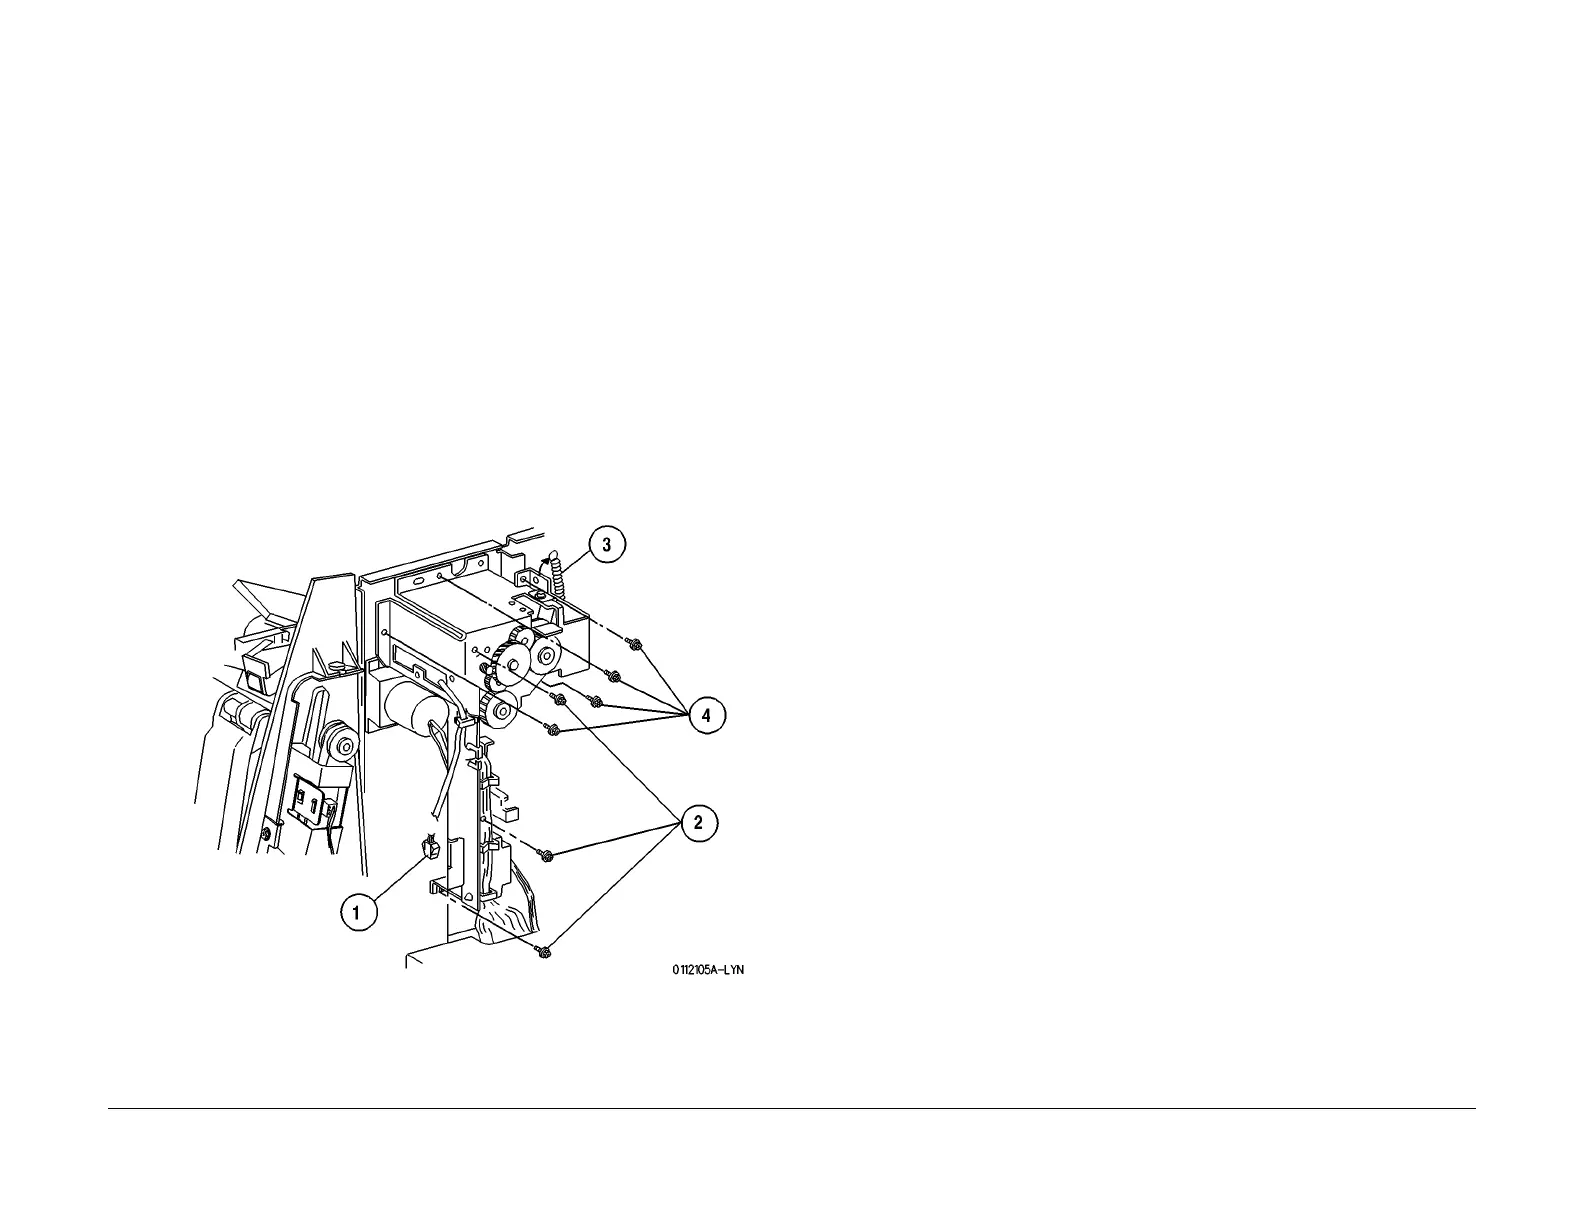
6. Remove the Eject Bracket Assembly (Figu
re 1).
1. Disconnect P/J10
86 and free the harness from all cable clamps.
2. Remove the screws (3) securing the Harness Bracket Assembly to the Finisher
fra
me, and remove the Assembly.
3. Unhook the Tension Spring from the Eject Bracket Assembly.
4. Remove the screws (4) securing the Eject Bracket Assembly to the finisher frame,
and remov
e the Assembly.
Figure 1 Remove the Eject Bracket Assembly
Replacement
1. Reinstall the Eject Bracket Assembly onto the Finisher frame. Ensure the cam follower pin
on the Offset Lever is correctly positioned in the cam in the Exit Bracket Assembly.
2. Use the screws (4) to secure the Assembly.
3. Hook the Tension Spring onto the Eject Bracket Assembly.
4. Reinstall the Harness Bracket Assembly to the Fi
nisher frame, and use the screws (3) to
secure the Bracket.
5. Ensure that P/J1055 to
the Eject Paddle Sensor did not accidentally become discon-
nected when the Harness Bracket Assembly was moved.
6. Reinstall the Stacker Offset Home Sensor.
7. Reconnect P/J
1086 and replace the harness in the harness clamps.
8. Reinstall the Eject Clamp Sensor.
9. Reinstall the Rear Lower Cover.
10. Reconnect the Finisher to the Printer.