1/05
4-22
DocuColor 12/DCCS50
REP 2.7.1, REP 2.7.2
Reissue
Repairs and Adjustments
REP 2.7.1 Tray 2-4 Take Away Drive
Parts List on PL 2.7B
Removal
WARNING
Turn power off and disconnect the power plug.
1. Remove the following parts:
a. IOT LVPS (REP 9.3.
2).
b. LVPS bracket (PL 9.3 I
tem 4)
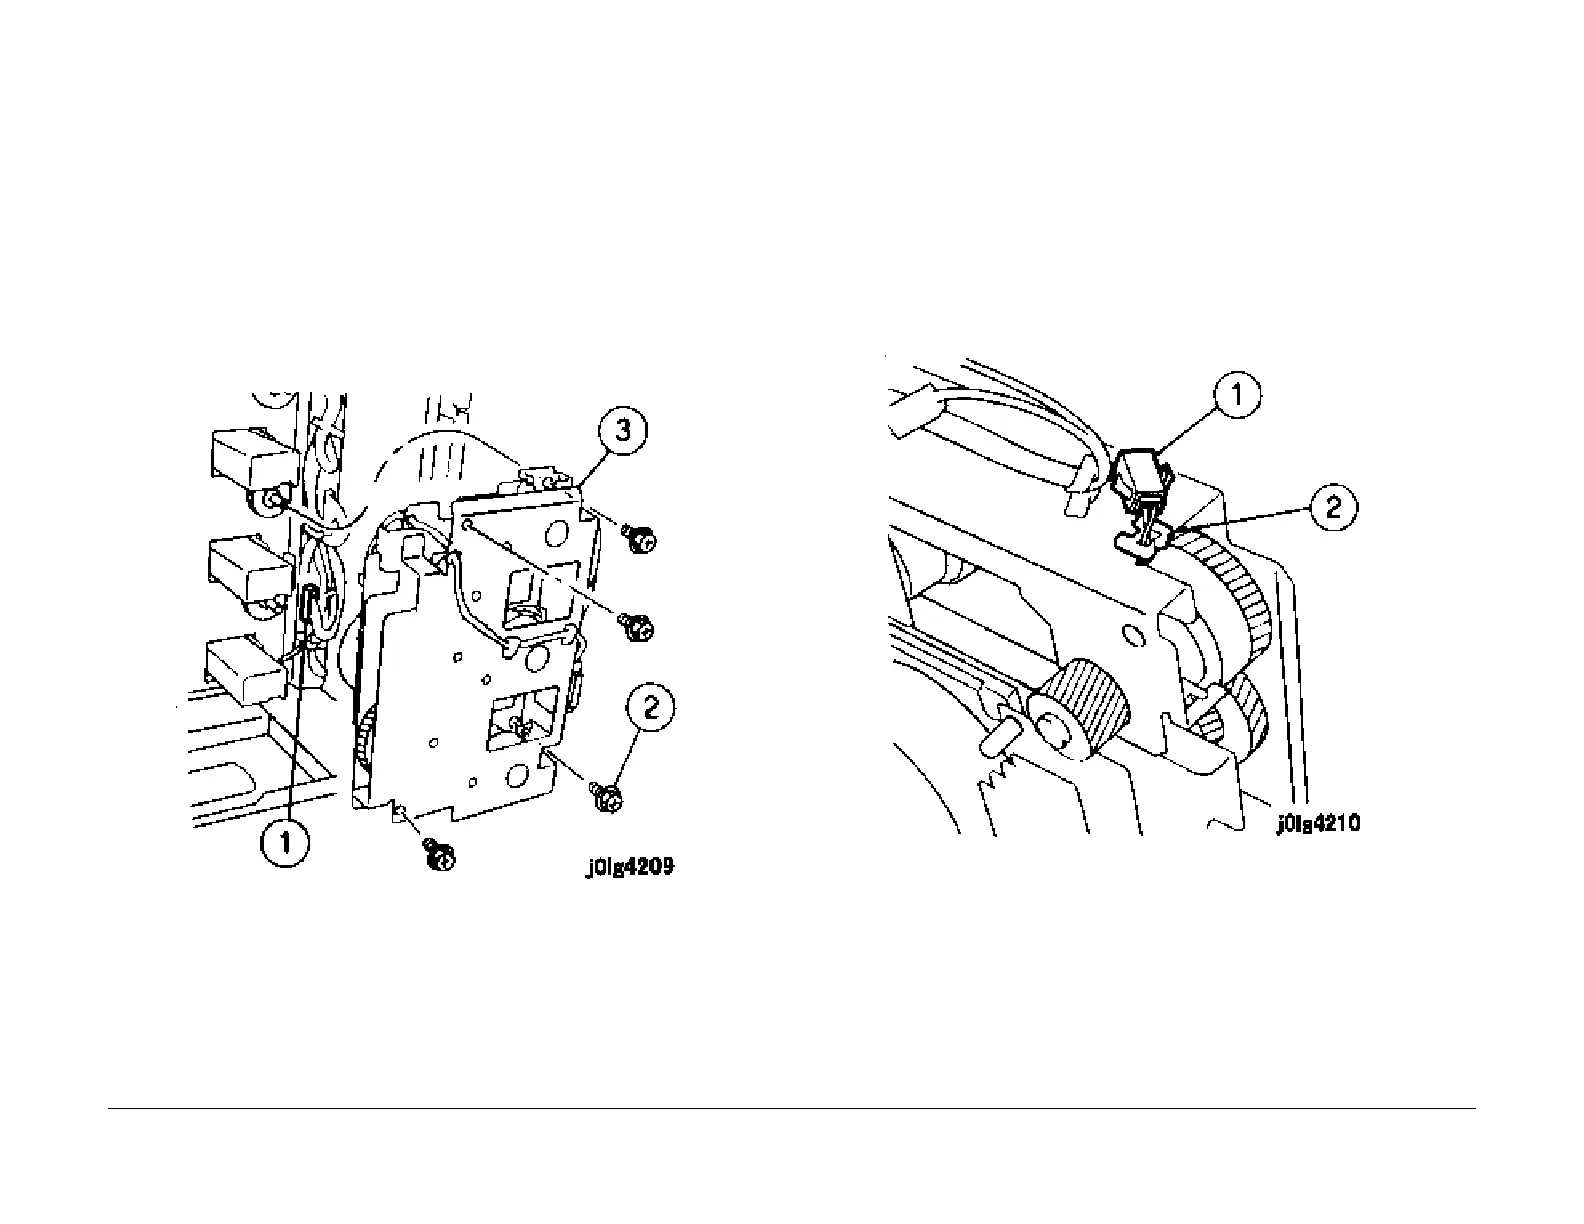
2. Remove the Tray 2-4 Take Away Drive (Figu
re 1).
1. Disconnect the connector.
2. Remove the screws (4).
3. Remove the Tray 2-4 Take Away Drive.
Figure 1 Removing the Tray 2-4 Take Away Drive
Installation
1. Reinstall the parts in the reverse order of disassembly.
REP 2.7.2 Tray 2/3/4 Feed T/A Clutch
Parts List on PL 2.7A
Removal
NOTE: This page describes how to remove the Tray 2 Feed T/A Clutch.
WARNING
Turn power off and disconnect the power plug.
1. Remove the Tray 2-4 Take Away Drive (REP 2.7.
1).
2. Disconnect the connector (Figure 1).
1. Disconnect the connector.
2. Remove the wire from the saddle edge.
Figure 1 Disconnecting the connector
3. Remove the Tray 2 Feed T/A Clutch (Figure
2).
1. Remove the E-clip.
2. Remove the gear.
3. Remove the bearing.
4. Remove the shaft. (Push the release button on the clutch.)
5. Remove the Tray 2 Feed T/A Clutch.
manuals4you.commanuals4you.com

 Loading...


