1/05
3-42
DocuColor 12/DCCS50
IQ 46 Black Bead Carryout RAP
Reissue
Image Quality
IQ 46 Black Bead Carryout RAP
This RAP is used when the copy is experiencing bead carryout (BCO) for the color black. This
defect looks like mottle and is most noticeable in the high density areas. BCO is caused by low
toner concentration.
NOTE: Only the effect the carrier beads have on the image of the output copy/print are visible.
T
he beads
are physically trapped by the fuser web and therefore will not be observed on the
copy/print.
Initial Actions
This RAP assumes IOT s/w version 6.00.2 or higher is installed. If not, go to IQ 19 Bead Carry-
out RAP to begin troubleshooting.
Ensu
re that the paper presently being used is fresh 24 lb. Xerox COLOR Xpressions (NASG),
or 90 GS
M Colortech + (ESG) paper or paper which is included in the customer’s Materials
Usage Guide and Recommended Paper List. Run test copies. If the copies reproduced still
have Bead Carryout, continue with this RAP.
Procedure
NOTE: Ensure that 8 1/2 X 11” LEF paper is installed in Tray 2 before continuing.
Enter the diagnostic mode from the UI and select MAX Setup. Select TRC Set UP/Toner Con-
centration Adjustment. Select TRC Control (dC922). Make a ProCon test pattern by pressing
the S
tart button. Examine the copy for mottle-like or non-uniform (spotty) density in the high-
density patches. One of these defects is present in the 100% patch (top row) in black.
YN
Go to I
Q 2 Defect Listing and choose
one or more of the following defects to continue
troubleshooting: mottle, high image density, deletions, or spots.
Select Close three times to take you back to the main menu. Select NVM Read/Write. NVM
locati
ons 773-021 through 773-028 are set to “1”.
YN
Select MAX Setup. Select and run ADC AGC Setup (dC934) and VH/VM Setup (dC933)
in M
ax
Setup (dC929) and investigate any system failure that is declared.
NVM 773-004 is set to “1”;
YN
Set NVM to “1”.
The value in NVM location 773-121 is between 5 and 95 (this number represents the per-
centage of room humidity).
YN
Replace the Humidity Sensor (PL
7.
1).
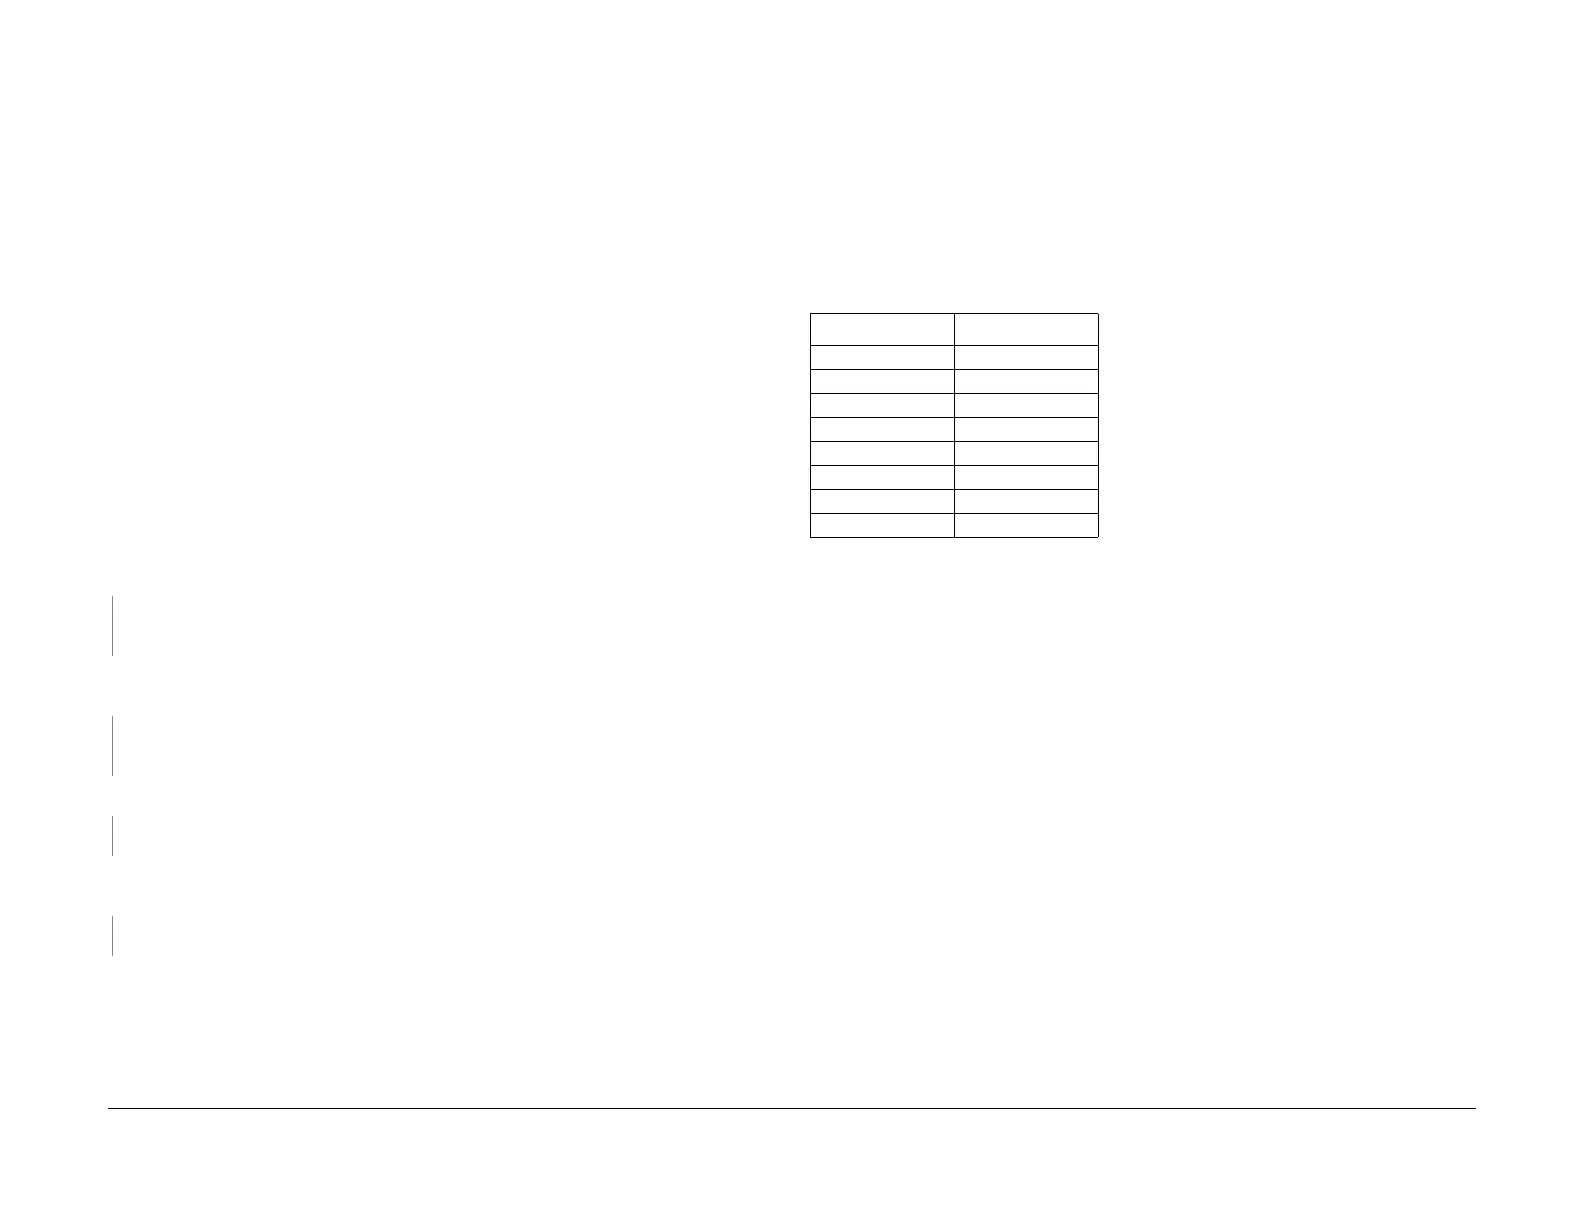
Refer to Tabl
e 1 to ensure that all the NVM settings indicated are correct. If any NVM value
needs to be changed, replace the developer material (REP 6.6.2). If all NVM values are correct
but it has been less than 2,000 copies since the IOT s/w 6.00.2 was installed, replace the
developer material (REP 6.6.2).
If the problem continues, perform the following correct
ive act
ion steps in order until the problem
is resolved.
• If the density is still light, check the Toner dispense s
ystem f
or any blockage or obstruction
that could limit the amount of Toner reaching the Developer Housing.
• Enter dC922 (TRC Control) from dC929 (Max Setup). Manually tone up black by setting
the
Tone Interval to 12. If the problem is resolved, refer to Table 1 and set NVM 775-664
to 70 and NVM 775-669 to 65.
• Replace the Developer Bias Brush, if damaged (REP
6.1.
4)
• Replace the Developer Housing, if damaged (PL 6.6).
•G
o to IQ 37
Developer Bias HVPS RAP.
Table 1 NVM Settings
NVM Location NVM Value
773-223 200
773-269 160
775-681 1
775-664 65
775-669 60
775-673 100
775-914 100
775-924 100
manuals4you.commanuals4you.com

 Loading...


