1/05
9-7
DocuColor 12/DCCS50
Edit Pad Installation
Installation Instructions
Reissue
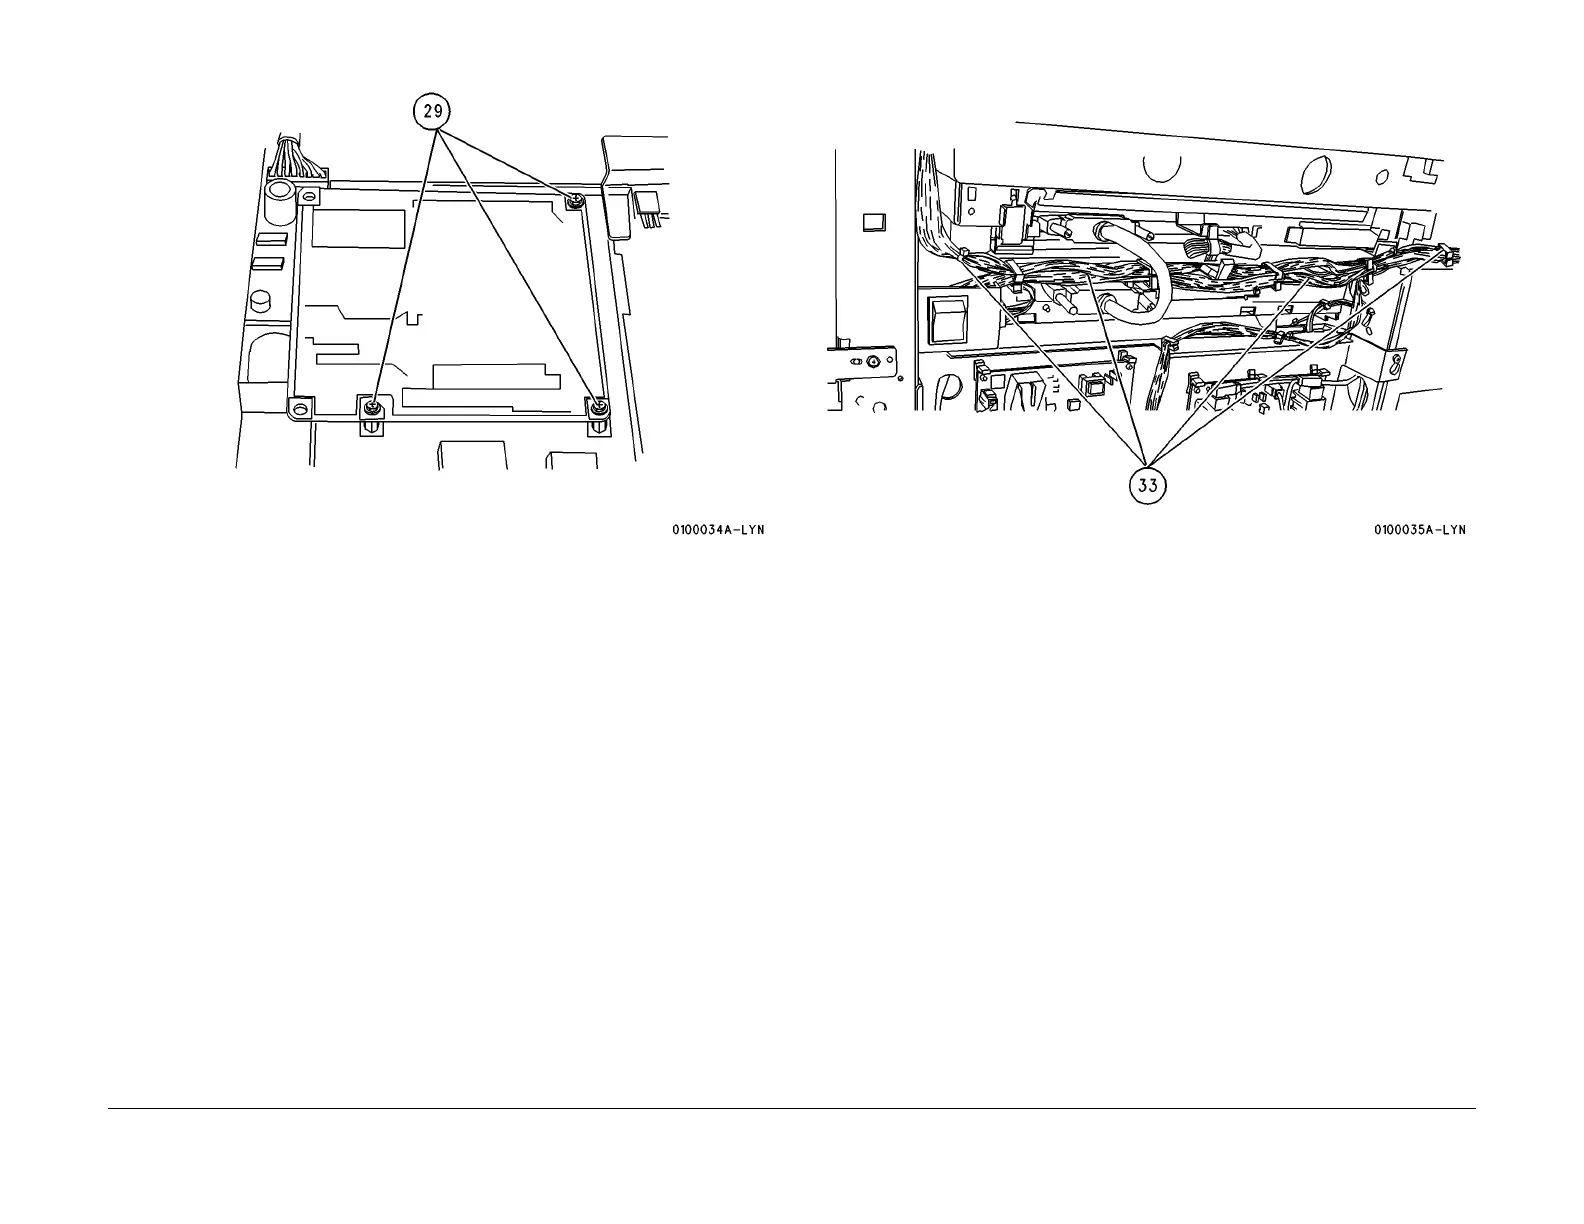
Figure 9 Install the IPS-EDIT PWB
30. Close the IPS PWB drawer and secure with (6) screws.
31. Reconnect the (5) connectors. (2) red and (3) white
32. Reconnect the Video Cable, Black Cable and the CCD Cable. Install the CCD Cable
Cov
er.
33.
Secure the Edit Pad Harness in the harness clamps
. Use additional cable ties as
required. (Figure 10)
Figure 10 Secure the Edit Pad Harness
34. Install the IOT Control PWB Assy into its upright position and secure with (3) screws.
35. Reconnect the Flat Cable (FPC-IOT).
36. Secure the Ground Strips to the Extension Plate.
37. Install the IOT Control PWB Assy Cover and secure with (7) screws.
38. Install the IIT Rear Cover, IOT Rear Cover and the Right Upper Cover.
39. Reconnect the Power Cord and power up the machine.
40. Enter dc131 and set location 752-012 to 1, to enable Edit Pad (can also be enabled via
dc371)
.
41.
Adjust the Touch Panel Starting Point (ADJ 9.1.
18).
42. Verify that the machine and the Edit Pad work correctly.
43. Mark off TAG P
24 on the IOT Change Tag Matrix if not already marked off.

 Loading...


