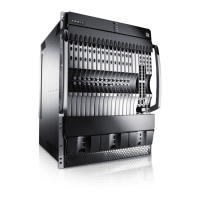
Chapter 6: System Control Module (SCM)
STANDARD Revision 1.0 C4® CMTS Release 8.3 User Guide
© 2016 ARRIS Enterprises LLC. All Rights Reserved. 190
Upgrade to an SCM 3 with the Compact Flash from an SCM II EM(U)
1. Perform a write memory to save the existing configuration. Make sure the chassis is running the 8.x.x.x software load.
Once you have verified that you are on the 8.x software load, execute a reload commit.
2. Back up the existing configuration with the following command:
copy running-config verbose /system/cfgfiles/backupMMDDYY.cfg
3. Use Secure FTP (SFTP) or FTP to transfer the configuration off the CMTS and save it on a local machine/server.
4. Power down the C4 CMTS.
5. Remove the SCM or SCM-II cards from the chassis.
6. Remove the flash disks from the two SCM II EM(U) cards that you removed and place them in the two SCM 3 cards. See
Replacing the Compact Flash Disk on a Duplex System.
7. Insert the two SCM 3 modules in slots 19 and 20.
8. If the previous SCMs had RS-232 serial or ethernet cables connected to the front of the card, then reconnect those
cables.
Note: By default, the SCM 3 out-of-band Ethernet cable connection defaults to the rear PIC connector. Either move the
out-of-band Ethernet cable to the rear PIC connector, or follow Upgrade to an SCM 3 Using the OOBM Ethernet Interface
(via front port of the SCM 3 Module) to use the front Ethernet connector.
9. Verify that all modules are in-service and that modems have registered.
10. Execute the following command:
reload commit
Upgrade to an SCM 3 Using the Serial Console Port (RS 232) Only
Note: This procedure is meant for sites using in-band management with no out-of-band Ethernet access.
1. Perform a write memory to save the existing configuration. Make sure the chassis is running the 8.x.x.x software load.
Once you have verified that you are on the 8.x.x.x software load, execute a reload commit.
2. Back up the existing configuration with the following command:
copy running-config verbose /system/cfgfiles/backupMMDDYY.cfg